
Many new feature enhancements and two bug fixes are included in the product update released in July 2025. The major enhancements in this release include the following:
-
Clinical
-
Administrative
Two Ascend Academic bug fixes are included in this release.
Clinical
Perio Exam Printout Now Includes Plaque and Calculus Values
Ascend Academic users can now print Plaque (PLQ), Supragingival Calculus (SPGC), and Subgingival Calculus (SBGC) data as part of the periodontal exam printout. The printed report accurately reflects all relevant charting details recorded during the exam.
Plaque and Calculus values (PLQ, SPGC, SBGC) are now included in the printed Perio exam report and are available when printing from the following sections:
Perio (Patient > Clinical > Perio)
Patient Clinical Report (Patient > Clinical > Print Clinical Report)
Ledger (Patient > Financial > Ledger > Insurance Claim > Attachments)
Note: You can print both draft and completed Perio exams from the Perio tab. However, to print the exam from the Patient Clinical Report or from the Ledger, the Perio exam must be completed.

Three Surface Quick Perio charting
In this release, we've introduced a time-saving enhancement to make periodontal charting faster and more efficient. When entering data for exams like Plaque, Calculus, Gingival Margin (GM), and Mucogingival Junction (MGJ)—which often have the same value across tooth surfaces. Now, users can apply a single value to all three surfaces Distal, Buccal, and Mesial at once. This eliminates the need to manually enter the same value multiple times for each surface.
A new Mark All Three Surfaces toggle is available when creating a new Perio exam (Patient > Clinical > Perio > New Perio Exam). When this option is enabled, entering a value on one surface such as 1D will automatically apply it to the other two surfaces 1B and 1M of the same tooth. This update is supported for screens with a minimum width of 1024px.
Note: This feature can be turned on or off at any time during charting. When unselected during charting the value will be entered to a single surface again in the current cursor position.

PIN-Based Approvals Now Available for SSO Users
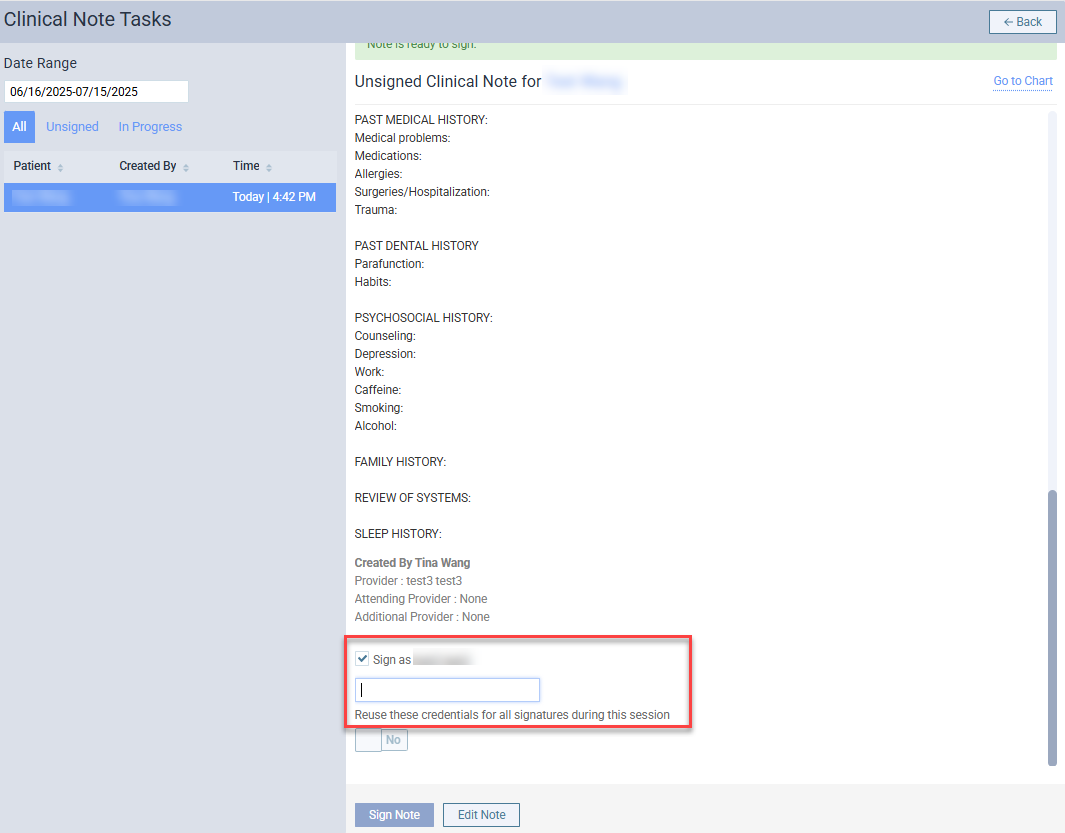
Users who log in using Single Sign-On (SSO) can now set up a 6-digit PIN to quickly and securely authenticate in specific areas of the portal to approve procedures and treatment plans. This new option streamlines authentication for SSO users.
Note: Non-SSO users will continue to use their regular passwords for authentication.
This update applies to the following sections of the portal:
1. Clinical Notes – Sign as Provider (Patient > Clinical)
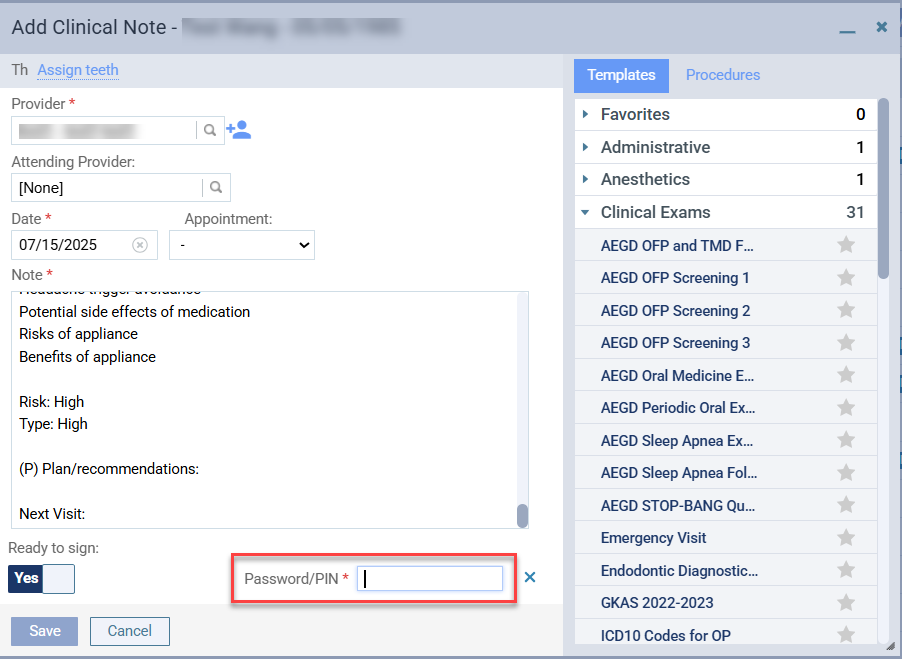
2. Clinical Notes - Sign as Attending Provider (Patient > Clinical)

3. Approve Treatment Plans (Patient > Treatment Planner)
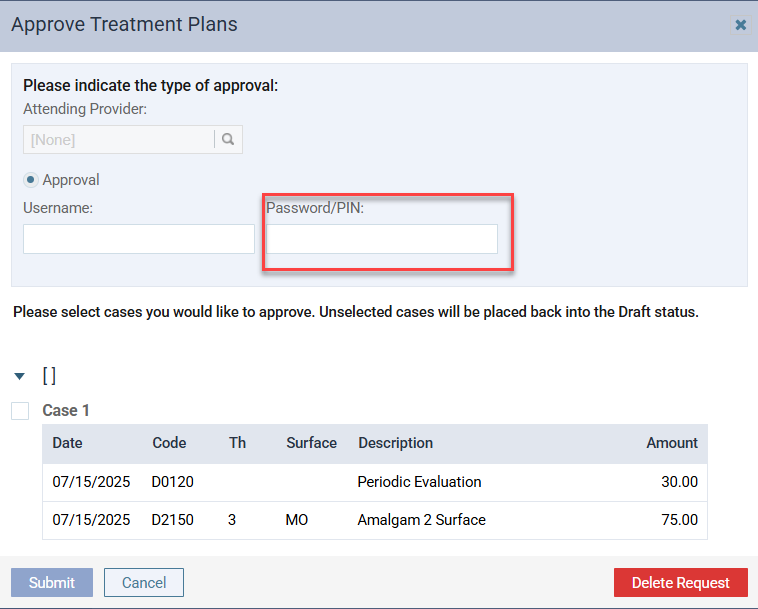
4. Change Case Status (Patient > Treatment Planner)

5. Edit Procedure in Approved Treatment Plans (Patient > Treatment Planner)

6. Approve Procedures (Patient > Treatment Planner)

7. Grant Access to Confidential Patient
When a student attempts to access a confidential patient record by searching and selecting the patient, faculty approval is required to grant access. Previously, faculty entered their username and password to authorize the student. Now, faculty using Single Sign-On (SSO) have the option to enter a PIN instead of their password for quicker authentication.

8. Sign & Complete checklist

9. Clinical Note Tasks (Provider Overview > Unsigned Clinical Notes widget)
Administrative
Exclude Simulation Patients Checkbox Added to Patient Exposure Report
A new Exclude simulation patients checkbox has been added to the Patient Exposure Report (Home > Reports > Patient Exposure Report) and is enabled by default. This feature allows users to track retake limits exclusively for real patients, excluding simulation patients from the report.
While simulation patient retakes are still recorded, enabling the Exclude simulation patients checkbox hides them from view. When the checkbox is unchecked, simulation patients appear in the report and are marked with a SIM badge. This visual indicator helps distinguish simulation patients when they are included in the report.

Steps to apply the Exclude Simulation Patients filter
1. Navigate to Home > Reports > Patient Exposure Report.
2. Under the Filter settings, locate the Exclude simulation patients checkbox.
Checked (default) - Simulation patients are hidden from the report, allowing focus on real patient activity.
-
Unchecked - Simulation patients are displayed with a SIM badge beside their names.
Note: Faculty and students can use the Group By filter (User or Patient) to help filter and organize results when using the Exclude simulation patients checkbox.
3. Click Search to apply the filter and view the updated report.


Bug Fixes
Delay in Loading Unresolved Claims for Patients
Issue: Insurance claims that had a high volume of claim history records caused significant load times or page unresponsiveness on the Unresolved Claims page.
Solution: Fixed by changing the behavior for claims with over 100 claim history records. The claim history is no longer loaded with the claim and instead an error message is displayed to inform the user.
Event Creation Allowed Without Required Rights
Issue: Users were able to create events even without the Manage Events security right assigned.
Solution: Fixed the permission checks to ensure that only users with the Manage Events permission can create events.
Comments
0 comments
Please sign in to leave a comment.