
The Patient Routing panel is a virtual route slip. It allows you to track patients throughout their visits by changing the appointment status manually.
Key benefits:
-
Flexibility: You can change an appointment's status without opening it. You can also view appointment and patient information on the panel without navigating to the patient record.
-
Allows you to select the patient record: You can clicktap the patient's name on the panel to open and view the patient's record.
-
Improves organization: Patients are grouped by appointment status. You can only view appointment(s) with with your subscribed status(es).
-
Updates automatically: It automatically updates whenever there is a status update. Once updated, it displays a notification regarding the update.
To work with the panel
-
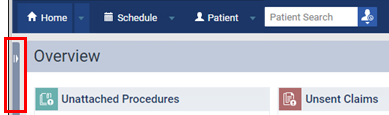
To open the panel, clicktap the thin, vertical bar on the left side of your browser window.
The Patient Routing panel displays.
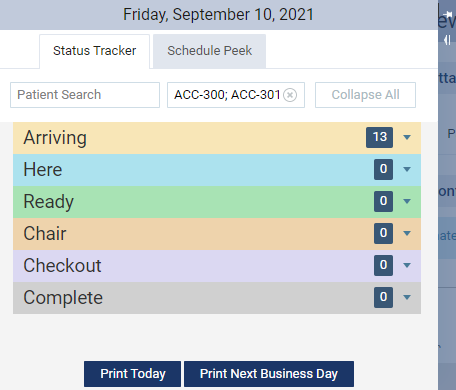
Note: By default, the Status Tracker tab is selected and the status sections are collapsed. The number of patients within a status displays on the section header.
Tip: You can pin and unpin the panel:
-
To pin the panel, open the panel and clicktap the left-pointing pin
 icon. Once pinned, it remains open until you close/unpin the panel or logout.
 -
To unpin the panel, open the panel and clicktap the down-pointing pin
 icon .
-
-
ClickTap a section header to expand the section. You may view and/or modify the following information for each patient:
-
Patient information - This information displays in all sections for each patient: photo, name, birth date, age, and medical alerts.
-
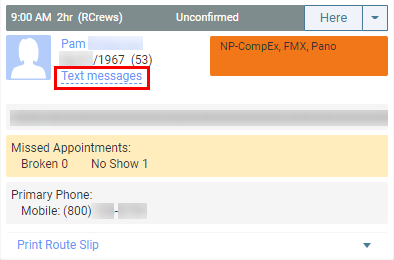
Text Messages - This link displays the complete text message history between the office and the patient's primary contact on the Messages for [patient's primary contact] window. The link only displays if you have the Review inbox messages user role permission set, the patient is subscribed to receive text messages, and the patient's primary contact number on the patient's record is valid.
-
Contact information - A patient's primary phone number displays in the Arriving section, and their primary contact and guarantor's contact information displays in all sections. You must clicktap the expand arrow to view the primary contact and guarantor's contact information.
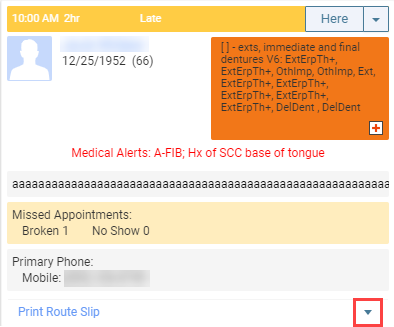
Once displayed, you can add or edit the primary and guarantor's contact information by clickingtapping the hyperlinks.
-
Missed appointments - The number of Broken and No Show appointments for each patient displays in the Arriving section.
-
Appointment information - This information displays in all sections for each patient: the appointment's start time, expected duration, status, and procedure(s).
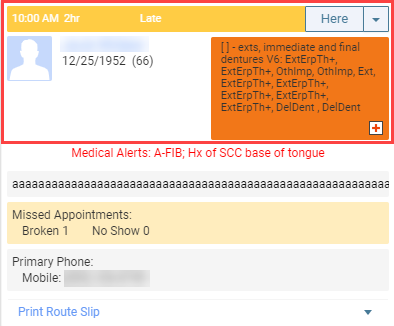
For more information, clicktap the procedure(s) to open the appointment on the Calender page.
-
Appointment note - Appointment note(s) display in all sections. You can add or edit note(s) in all sections except Arriving.
-
Follow-up - The Needs Follow-up check box displays in all sections except Arriving. If a patient requires a follow-up after their treatment, the check box is already selected. You can modify the check box as necessary to display the correct information.
-
Premedicate - The Premedicate check box only displays in the Here, Ready, and Chair sections. If a patient requires medication before treatment, the Premedicate check box is already selected. You can modify the check box as necessary to display the correct information.
-
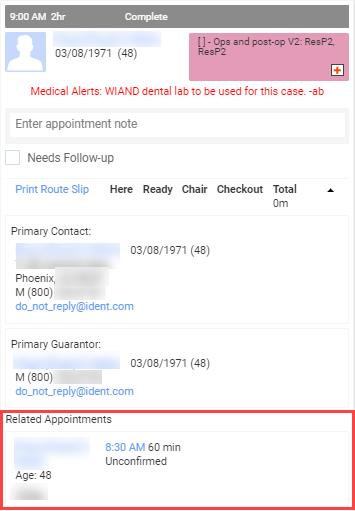
Other patient and appointment information - This information displays in all sections for each patient. If a patient is related to another patient that has an appointment today, their information displays under Related Appointments. It displays basic information on the related patient and their appointment, such as their name and appointment time. To view Related Appointments, clicktap the expand arrow.
-
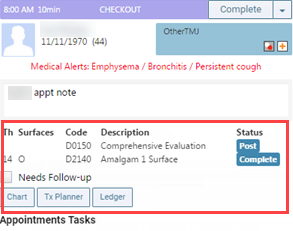
Procedures - You can work with procedures in the Chair, Checkout, and Complete sections:
-
To post a procedure that is attached to the appointment, clicktap Post.
-
To complete and post a procedure, clicktap Complete
-
-
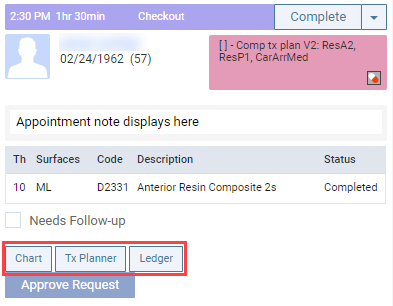
Clinical buttons - The buttons display depending on the section you have expanded:
-
In Chair, the Chart, Perio, and Tx Planner buttons display.
-
In Checkout, the Chart, Tx Planner, and Ledger buttons display.
To view a patient's chart, treatment planner, perio chart, or ledger, clicktap the corresponding button.
-
-
Clinical note - Clinical notes regarding a patient's visit display in the Checkout and Complete sections. In the Complete section, you can clicktap Add Clinical Note to add a new note.
-
Print Route Slip link - In all sections, you can clicktap the Print Route Slip link to print a route slip for the patient.
-
Status time tracking - This information displays next to the Print Route Slip link in all sections except Arriving. You can view how long a patient was in each status and the total length of the entire visit.
-
Appointment Tasks - This list of important task(s) displays in different sections based on what is required. You may need to complete the task(s) before the patient leaves the office.
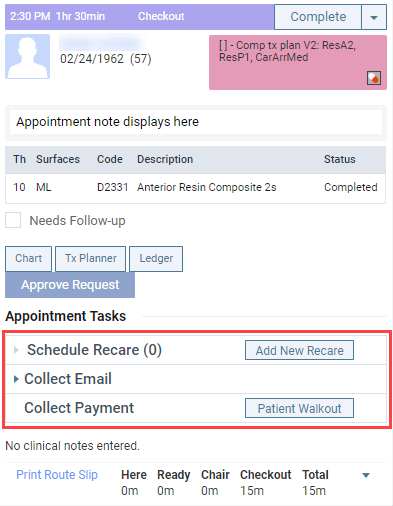
These possible tasks include:
-
Scheduling the patient's recare appointment.
-
Collecting the patient's primary contact number and email address.
-
Collecting payment.
To perform the task(s), clicktap the corresponding button(s) or the drop-down arrow.
Notes:
-
The task to Collect Email or Collect Phone Number only displays under certain statuses and when the information is missing.
-
The task to Collect Payment only displays if the patient portion of the balance is greater than zero.
-
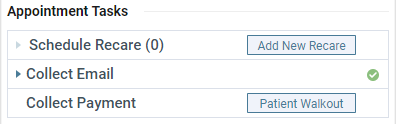
If complete, the task has a green check mark.
-
-
-
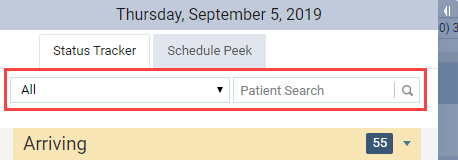
(Optional) Filter the patients:
-
To filter by operatory, use the operatory drop-down list.
Note: The Patient Routing panel displays patients with appointments in all operatories by default.
-
To filter by patient name, use the Patient Search field.
-
-
To change an appointment's status to the next status, clicktap the status button.

-
To change an appointment's status to one other than the next status, clicktap the
 icon and select a status.
Note: The status button on the Patient Routing panel reflects the next status that will be assigned to the appointment if you clicktap the button.
Comments
0 comments
Please sign in to leave a comment.