
The Patient Routing panel is a virtual route slip. You can use it to track and change the statuses of patients' visits.
To route a patient electronically
-
The receptionist at the front desk opens the Calendar page to schedule an appointment for a patient who has called in.
-
When a patient arrives at the office, the receptionist opens the Patient Routing panel and clickstaps the Here status button of the patient's appointment card.

The appointment's status changes to HERE, and the patient now displays in the Here section.
Tip: If the patient is late for their scheduled appointment, clicktap the
 icon, and select Late. The appointment's status changes to Late, but the patient remains in the Arriving section.
 -
When the patient is checked in, the receptionist clickstaps the Ready status button.
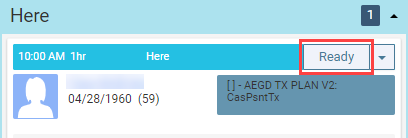
The appointment's status changes to READY. The hygienist in the back office, at their computer, sees the notification of the status change, and the patient now displays in the Ready section.
-
After escorting the patient to an operatory chair, the hygienist clickstaps the Chair status button.
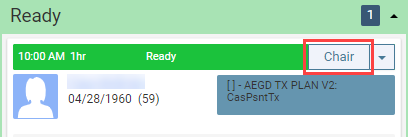
The appointment's status changes to CHAIR and the appointment now displays in the Chair section.
-
The hygienist clickstaps the notification to dismiss it.
-
On the Patient Routing panel, the hygienist clickstaps Chart.
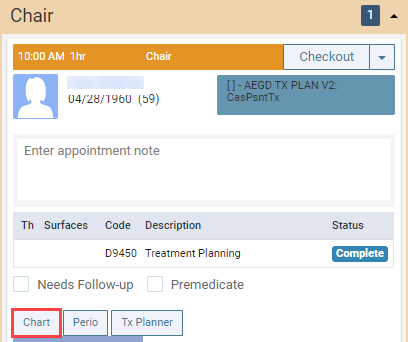
The patient's clinical chart displays.
-
After work is completed on the patient, the hygienist opens the Patient Routing panel (if it is not already open) and clickstaps the Checkout status button. The patient walks to the front desk to check out.
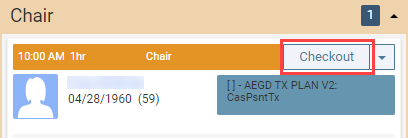
The appointment's status changes to CHECKOUT. The receptionist at the front desk sees the notification of the status change, and the appointment displays in the Checkout section.
-
The receptionist clickstaps the notification to dismiss it.
-
On the Patient Routing panel, the receptionist clickstaps Ledger.

The patient's Ledger page displays.
-
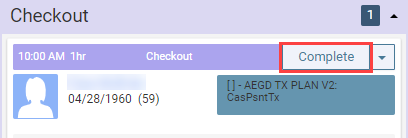
After the receptionist checks out the patient, on the Patient Routing panel, they clicktap the Complete status button.
Notes:
-
If you attempt to change an appointment to COMPLETE status and a task is not complete, a warning message displays and includes a link to provide a reason for not completing all tasks.
-
If you attempt to change an appointment to COMPLETE status and any listed procedures are not complete, a reminder displays to complete all the procedures from today's appointment.
-
-
If prompted to provide a reason for not completing all tasks, click the provide a reason for skipping incomplete tasks hyperlink to display the Reason to Skip Completing All Tasks window and select a standard reason or provide a custom reason for skipping task(s), then clicktap Save Reason to move the appointment to COMPLETE status.
-
If prompted with the Post Procedures Complete window, complete one of the following:
-
ClickTap Back to Appt. to return to the appointment and continue working in the CHECKOUT status.
-
ClickTap Complete to complete the procedures performed during this visit.
-
Acknowledge the reminder and clicktap Complete Appt. to move the appointment to COMPLETE status.
-
If you completed the appointment, the corresponding patient now displays under the Complete section on the Patient Routing panel.
Comments
0 comments
Please sign in to leave a comment.