
When necessary, you can link conditions to a procedure. This can help reduce the number of rejected insurance claims due to missing condition codes.
Note: You cannot modify a procedure to link a condition if it is locked, attached to an insurance claim, associated with a rejected treatment plan, or a payment has already been posted for it.
Tips:
-
If locked, you can unlock and edit the locked procedure.
-
If an insurance payment has already been posted, you can void the procedure, re-post it correctly, and post an offsetting adjustment.
Important: To edit a completed procedure, you must have the Edit completed procedure Bill to insurance and the Edit completed procedures security rights.
To link a condition to a procedure
How to get there
-
Use the Patient Search field to access a patient's record.
Notes:
-
If the last patient record you accessed since you last logged on is the correct patient's record, you do not need to re-enter the patient's name in the Patient Search field.
-
You can include inactive patients in the search results by setting the Include inactive patients toggle to On.
Important: If the Access Confidential Patient window displays after selecting the patient from the search results, it means the patient is a confidential patient and you do not have the security rights to access their record. To continue, a user with the security rights must enter their credentials into the window. Once given access, you have access to the patient's information until your session expires.
-
-
From the Patient menu, under Clinical, clicktap Progress Notes.
The patient's clinical record displays with the Progress Notes tab selected.
How to get there
-
Use the Patient Search field to access a patient's record.
Notes:
-
If the last patient record you accessed since you last logged on is the correct patient's record, you do not need to re-enter the patient's name in the Patient Search field.
-
You can include inactive patients in the search results by setting the Include inactive patients toggle to On.
Important: If the Access Confidential Patient window displays after selecting the patient from the search results, it means the patient is a confidential patient and you do not have the security rights to access their record. To continue, a user with the security rights must enter their credentials into the window. Once given access, you have access to the patient's information until your session expires.
-
-
Complete one of the following:
-
From the Patient Information ribbon, clicktap the Tx Planner link.

-
From the Patient menu, under Clinical, clicktap Treatment Planner.
-
From the Patient menu, under General, clicktap Overview.
The patient's Overview page displays.
ClickTap the Treatment Plan widget.
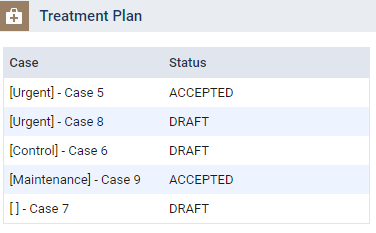
The patient's clinical record displays with the Tx Planner tab selected.
-
How to get there
-
Use the Patient Search field to access a patient's record.
Notes:
-
If the last patient record you accessed since you last logged on is the correct patient's record, you do not need to re-enter the patient's name in the Patient Search field.
-
You can include inactive patients in the search results by setting the Include inactive patients toggle to On.
Important: If the Access Confidential Patient window displays after selecting the patient from the search results, it means the patient is a confidential patient and you do not have the security rights to access their record. To continue, a user with the security rights must enter their credentials into the window. Once given access, you have access to the patient's information until your session expires.
-
-
Complete one of the following:
-
From the Patient menu, under Financial, clicktap Ledger.
-
From the Patient menu, under General, clicktap Overview.
The patient's Overview page displays.
ClickTap the Ledger widget.

The patient's Ledger page displays.
-
-
Complete one of the following:
-
Open a patient's record > Progress Notes tab.

-
Open a patient's record > Treatment Planner tab and select a treatment plan.

-
Open a patient's Ledger page.

-
-
Select a listed procedure to display the Edit Procedure window.
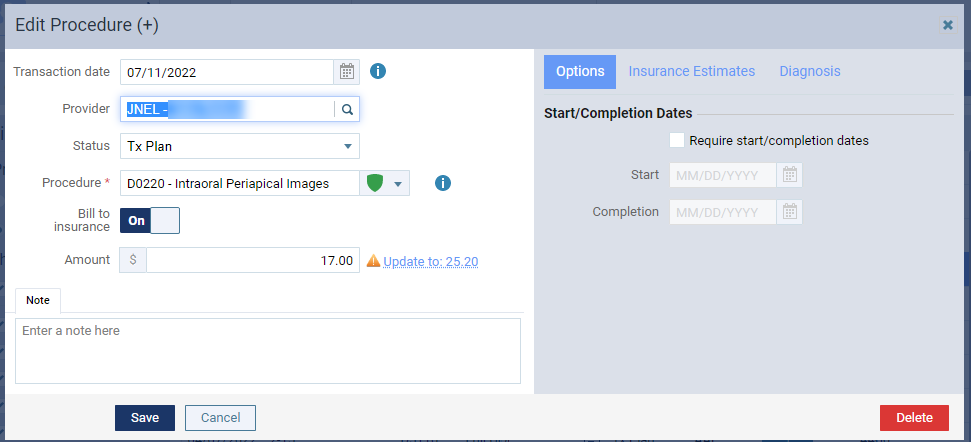
Note: If the procedure is locked, the View Procedure window displays instead. You can unlock it to edit.
-
ClickTap the Diagnosis tab and attach the necessary diagnosis codes.
-
In the search field, enter part of a condition's ICD-10 code, SNOMED code, or description to search for a condition that has been charted for the patient.
-
Select the correct diagnosis.
Note: You can attach up to 20 diagnostic codes to the procedure.

-
-
ClickTap Save.
Comments
0 comments
Please sign in to leave a comment.