
You can schedule an appointment for a patient that has never been to your office before.
When booking for new patients, you will book the appointment and create the new patient record at the same time.
To schedule an appointment for a new patient
How to get there
-
From the Schedule menu, select Calendar.
The Calendar page displays.
-
On the Calendar page, navigate to a day or week.

-
ClickTap an open time slot.
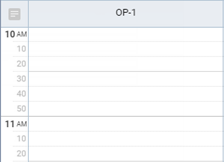
Tip: You can also clicktap the Actions menu and select Create Appointment.

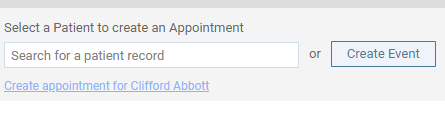
The Appointment Information panel displays.
-
Confirm that the patient does not exist in your practice database.
-
Use the Patient Search field to access a patient's record.
-
Complete one of the following:
-
If the patient's record displays, clicktap the patient name in the generated list and schedule their appointment as an existing patient.

-
If the patient does not have a record, clicktap + New patient appt to add the patient.

Options to add the patient display.

Tip: If the patient wants to book appointments for multiple people, clicktap + Create New Household to add multiple patients at once.
-
-
-
Enter the patient's information.
-
First Name, Last Name - Enter the patient's first and last name.
-
Gender - Select the patient's gender.
-
Birthdate - Enter the patient's birth date.
-
-
Complete the Appt tab fields as necessary to book the appointment.
-
Status - If necessary, select a different status for the appointment. The corresponding status icon displays on the appointment.

Note: By default, all new appointments are set to Unconfirmed status and display the
 icon.
icon. -
ASAP - Select the check box if the patient wants to be contacted if an earlier date and/or time becomes available. If selected, the patient displays on the ASAP list and the
 icon displays on the appointment.
 -
Needs Follow-up - Select the check box if the procedures for this appointment require you to follow up with the patient after their visit. If selected, the patient displays on the Patient Follow-up list after their appointment.
-
Premedicate - Select the check box if the patient prefers to be medicated before the procedures or if any of the procedures require premedication. If selected, the
 icon displays on the appointment.
 -
Other - If necessary, clicktap the field and enter the reason for the appointment.
-
Operatory - Select an operatory from the list.
Note: If you selected a time slot in Step 2 while viewing by operatory, an operatory is selected by default.
Tip: To change the operatory quickly, clicktap the appointment and clicktap to a different operatory.
-
Appointment Provider - Select an appointment provider from the list or clicktap and drag the appointment to a different provider's column.
Notes:
-
If you selected a time slot in Step 2 while viewing by provider, a provider is selected by default.
-
If your organization has multiple locations, a provider is only available for selection if they have rights to the current location.
If you need to add a secondary provider for the appointment, such as a hygienist, you can clicktap the
 icon to display the Additional Provider field and select a secondary provider from the list. A colored box
  (determined by the provider color assigned to this provider) displays on the appointment.
 Tip: To remove the Additional Provider field, clicktap the
 icon.
icon. -
-
Attending Provider - Select a faculty member from the list that will supervise and be associated with the appointment.
Note: If your organization has multiple locations, a faculty member is only available for selection if they have rights to the current location.
-
Date - ClickTap the field to select a different date.
Note: The date displayed on the Calendar page is selected by default.
-
Time - ClickTap the field and enter a time.
Notes:
-
If you selected a time slot in Step 2, a default time is already entered.
-
You can enter a time using various formats, such as 08:30, 8:30a, or 8:30 AM; 8a or 8am.
Tip: To change the time quickly, clicktap the appointment and clicktap to a different time.
-
-
Length - If necessary, enter a different time length of the appointment.
Note: The length of the appointment defaults to the specified time range.
-
Note - Enter a note relevant to the appointment. To insert today's date, clicktap Insert Date. If there is an appointment note, a
 icon displays on the appointment.
-
-
Complete the Contact Info tab fields as necessary to add the patient's contact information and contact preferences.
Note: Any saved changes from the appointment are also reflected in the patient's record.
-
Address, City, State, ZIP Code - Enter the patient's address information.
-
Phone Type, Phone Number, Ext - Enter the patient's phone information.
-
Email - Enter the patient's email address.
-
Preferred Contact Method - Select the Call me, Text me, or Email me radio button.
-
Primary Contact Information - To set the patient's primary contact, complete one of the following as necessary:
-
Skip this step to set the patient as their own primary contact.
-
ClickTap the
 icon, enter the contact's name, and select the appropriate name from the list of matching results.
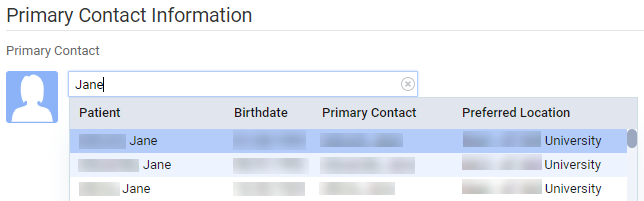
Tip: You can copy the primary contact's phone number to the patient by clickingtapping the
 icon. You can also copy the patient's phone number to the primary contact by clickingtapping the
  icon.
icon. Note: To set someone else as the patient's primary contact, they must have an account at your location. If the primary contact does not have an account and is not a patient at your location, you need to create an account for them with an inactive status.
-
-
-
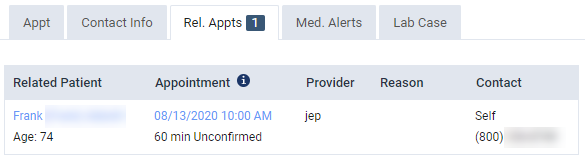
(Optional) ClickTap the Rel. Appts tab to review any appointments for other members of the patient's household with appointments scheduled on the same day.
Tip: If any are scheduled, a number displays next to the tab name.
-
(Optional) ClickTap the Med. Alerts tab to add medical alerts as necessary.
-
ClickTap Add Medical Alert to display the Add Medical Alert for window.
-
In the Medical Alert field, enter the alert.
-
-
ClickTap Save.
Note: If you are not the appointment provider and the appointment is within the next 2 hours, Ascend Academic will display a notification to the device the appointment provider is logged into.
Comments
0 comments
Please sign in to leave a comment.