
For any location, you can customize the default clinical note templates that are included with axiUm Ascend and any of your custom clinical note templates.
Note: A location's clinical note templates are available when entering clinical notes only from that location. However, if a user makes a clinical note template a favorite, it will be available for that user from any location.
To customize a clinical note template
How to get there
-
If you are not already viewing the correct location, select it from the Location menu.
Tip: Even though a clinical note template is associated with a location, if someone makes that template a favorite, that person will have access to it from all locations because favorites are associated with user accounts.
-
From the Settings menu, under Patient Care, clicktap Clinical Note Templates.
The Clinical Note Template Setup page displays.
-
On a location's Clinical Note Template Setup page, select a clinical note template.
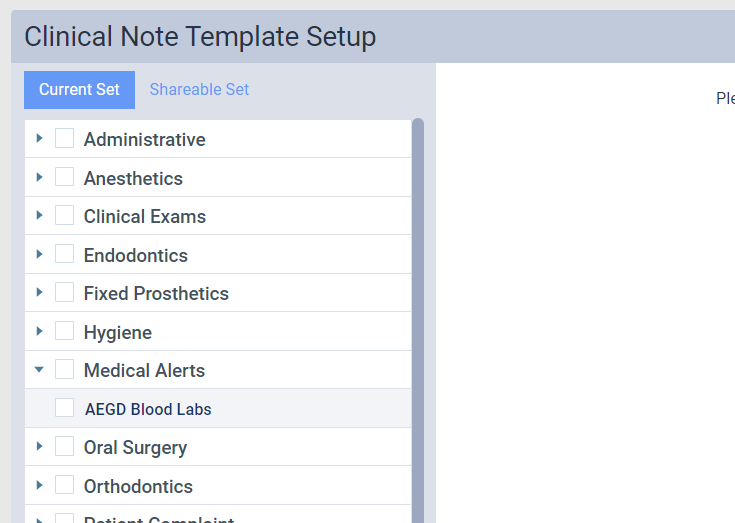
The options for editing the clinical note template appear.
-
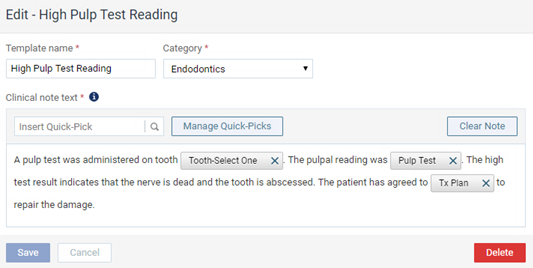
Change the name and/or category of the template, and then change the note text and quick-picks (prompts) as needed.
Set up the following options:
-
Template name - Type a name for the template.
-
Category - Select one of the pre-defined categories for this template.
-
Clinical note text - Type the text of the note, and insert quick-picks as needed.
Quick-picks: A quick-pick allows you to create a clinical note from a template dynamically. When you use a template that has quick-picks to add a clinical note, axiUm Ascend will show messages that prompt you to enter responses to the specified questions.
-
Inserting - To insert a quick-pick where the text cursor is positioned, do any of the following:
-
In the Insert Quick-Pick search field, begin typing to search for one of the pre-defined quick-pick, continue typing as needed to narrow results list, and then select the desired quick-pick.

-
Use the Ctrl + , (comma) key combination to make a search field appear, begin typing to search for one of the pre-defined quick-picks, continue typing as needed to narrow results list, and then either clicktap the desired quick-pick or use the down arrow key to select the desired quick-pick and then press Enter.

-
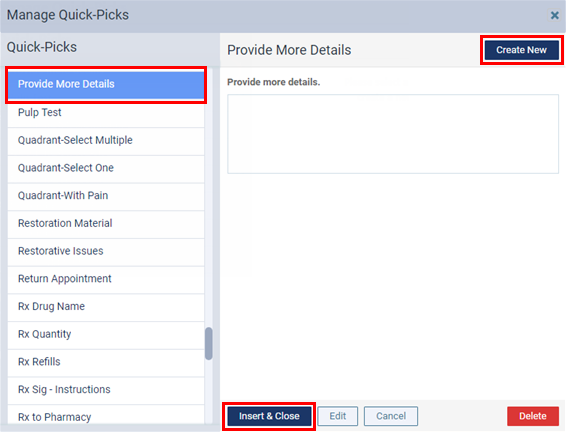
To browse for a quick-pick and then insert it, clicktap Manage Quick-Picks, select one of the Quick-Picks, and then clicktap Insert & Close.

-
To create a new quick-pick and then insert it, clicktap Manage Quick-Picks, clicktap Create New, complete the steps to create the quick-pick, and then, with that newly created quick-pick selected, clicktap Insert & Close.
-
-
Removing - To remove a quick-pick from the note text, clicktap that quick-pick's Remove button.

-
-
-
ClickTap Save.
Comments
0 comments
Please sign in to leave a comment.