
You can remove an appointment request from your location's calendar by rejecting or deleting it according to your security rights. If you have the Manage Appointments user role permission set, you can reject any appointment request if it is incorrect, no longer required, or cannot be accommodated. If you do not have the user role permission set, you can only delete your own appointment requests.
To reject or delete an appointment request.
How to get there
-
From the Schedule menu, clicktap Appointment Requests.
The Appointment Requests page displays.
How to get there
-
From the Schedule menu, clicktap Calendar.
The Calendar page displays.
-
Complete one of the following:
-
On the Appointment Requests page, review the listed appointment requests.
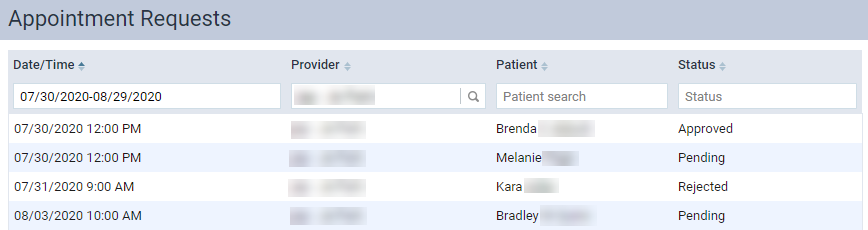
Note: The page displays a list of pending, approved, and rejected appointment requests with appointment dates within the next 30 days.
-
On the Calendar page, review the displayed schedule.

Note: Appointment requests display on the Calendar page with a cross-hatching background.
-
-
(Optional) Set the filters as necessary.
-
The Appointment Requests page.
-
Set the Date/Time field to display appointment requests with appointment dates within a certain date range.
Note: By default, the list displays requests with appointment dates within the next 30 days.
-
ClickTap the Date/Time field and select one of the following:
-
Today
-
Yesterday
-
Next 7 Days
-
Next 30 Days
-
Next Year
-
This Month
-
Last Month
-
Specific Date
-
Custom Range
-
-
If you selected Specific Date, select a date from the calendar that displays and clicktap Done.
-
If you selected Custom Range, select two dates from the calendar that displays and clicktap Done.
-
-
Use the Provider field to display appointment requests with a specific requestor.
-
ClickTap the Provider field and if necessary, clear the field.
-
Enter a requestor's name to narrow the list of providers and select it from the search results.
-
-
Use the Patient Search field to display appointment requests for a specific patient.
-
Enter a patient's name in the Patient Search field.
-
(Optional) ClickTap the Include all locations toggle switch to On to include patients from all locations in the search results.
-
(Optional) ClickTap the Include inactive patients toggle switch to On to include inactive patients in the search results.
-
(Optional) If the patient search returns too many results, clicktap Use advanced patient search for a more focused search results.
-
ClickTap the patient's name.
-
-
Use the Status field to display appointment requests with a specific status.
-
ClickTap the Status field.
-
Select the Pending and/or Approved check box.
-
ClickTap Apply Selected or clicktap anywhere outside of the generated menu.
-
-
-
-
ClickTap an appointment request.
The appointment request's Appointment Information panel displays.
-
ClickTap Delete.
The Delete Appointment window displays.

Note: If you're deleting your own appointment request, the window displays with the "Request withdrawn by original requestor" message.
-
Enter the reason for the rejection or deletion in the Please provide a comment field.
Note: Although this step is not mandatory, it is recommended you enter the reason for recording purposes. Also, if you are rejecting due to incorrect information, it is recommended you leave a detailed reason for the requestor.
-
ClickTap OK.
Comments
0 comments
Please sign in to leave a comment.