
You can process and sign your clinical notes on the Clinical Note Tasks page. Once signed, the note is locked and can no longer be edited. Depending on the note, the following providers may need to sign the note:
-
Provider: The primary provider.
-
Additional Provider: The secondary provider. If set, the additional provider can sign after the attending or primary provider has signed.
-
Attending Provider: The faculty provider that usually supervises the treatment. This provider is mandatory for students and other users that do not have the Sign clinical notes security right.
Important: You can only sign clinical notes if your digital signature is set up.
Note: If a clinical note has an attending provider set, the primary provider cannot sign.
Tip: A sign mode feature allows you to reuse your signature while signing clinical notes until the session expires. If enabled, you can work your way through any Unsigned, Not Entered, and In Progress clinical notes without having to re-enter your password.
To sign clinical notes
How to get there
-
From the Home menu, under Location, select Overview.
The Provider Overview page displays.
Note: If the Overview page displays instead, set the Provider Overview toggle to Yes.
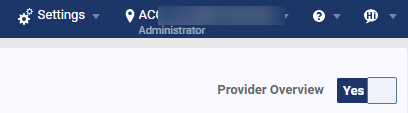
Important: If you are not a provider, the toggle does not display.
-
On the Provider Overview page, clicktap the Unsigned Clinical Notes widget.
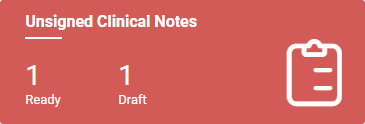
Note: The number of unsigned clinical notes that are ready to sign display in the Ready category, and the number of notes that are not ready to sign display in the Draft category.
The Clinical Note Tasks page displays with the All tab selected and the latest unsigned clinical note open.

-
ClickTap the Unsigned tab to display a list of your unsigned clinical notes.
Tip: If necessary, you can clicktap the patient's name or the Go to Chart link to open and quickly review their Chart page in a new browser tab.
-
(Optional) ClickTap Edit Note to edit the clinical note.
Note: When you edit a clinical note, the action is recorded in the Audit Log page as a Clinical Note type with 'Update' in Action.
-
Edit an unlocked clinical note.
-
Modify the following fields as necessary:
-
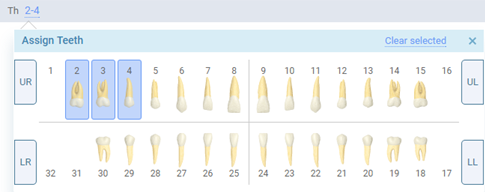
Th - Review the assigned teeth. If necessary, you can assign or remove teeth from the note by adding and/or removing the tooth numbers. To add and/or remove tooth numbers, complete the following as necessary:
-
ClickTap the Assign teeth or the assigned tooth number(s) link.

Note: If the note does not have any assigned teeth, the Assign teeth link displays. If the note has assigned teeth, the link displays as the assigned tooth number(s), such as 2,4.
A tooltip displays.
-
To add tooth number(s), select the necessary teeth. To remove tooth numbers, deselect the selected teeth.
-
When ready, clicktap X to close the tooltip.
-
-
Provider - Review the primary provider assigned to the note.
If you need to add a secondary provider to the note, you can clicktap the
 icon to display the Additional Provider field and enter a secondary provider.
 Tip: To remove the Additional Provider field, clicktap the
 icon.
icon. Note: If your organization has multiple locations, a provider is only available for selection if they have rights to the current location. The exception to this is when a provider is associated with the appointment and no longer has access to the current location; that provider is available in the list unless you select a different provider and save the change.
-
Attending Provider - Review the faculty provider assigned to the note.
Note: If your organization has multiple locations, a faculty provider is only available for selection if they have rights to the current location. The exception to this is when a provider is associated with the appointment and no longer has access to the current location; that provider is available in the list unless you select a different provider and save the change.
-
Date and Appointment - Review the set date or linked appointment. If necessary, edit the fields by completing any of the following:
-
To associate with a specific date, set the Date field to the date and set the Appointment field to -.
-
To link to an appointment, set the fields to the appointment's date and time.
Note: If you link to an existing appointment, the Attending provider field automatically updates to the linked appointment's attending provider.
-
-
Note - Review and, if necessary, edit the note. You can also edit the note by inserting one from a template. To insert a note from a template, select a template listed under the Templates tab. If prompted, respond to enter data and then clicktap Done.
-
Ready to sign - Set the toggle to Yes to set the clinical note as ready to sign. Set the toggle to No to set the clinical note as not ready to sign.
-
ClickTap Save.
-
-
Edit a locked clinical note by adding an addendum.
Note: The clinical note is locked if you are set as the additional provider, and the attending provider or the provider already signed the note.
-
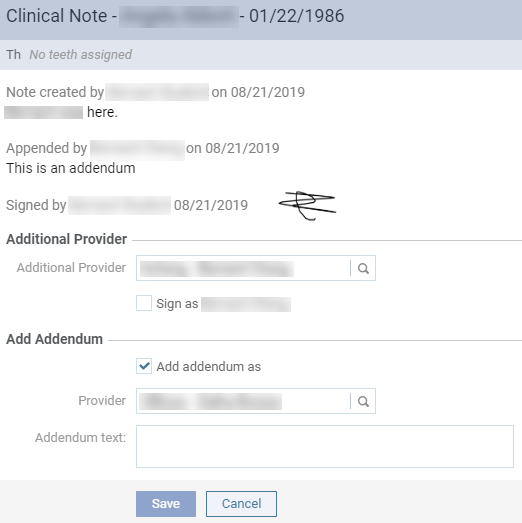
Select the Add addendum as check box.
The options for adding an addendum become available.
-
Enter a provider in the Provider field.
Note: If your organization has multiple locations, a provider is only available for selection if they have rights to the current location.
-
Enter any relevant note(s) in the Addendum text field.
Important: The addendum cannot be edited once you save it.
-
ClickTap Save.
-
-
-
Select the Sign as [user name] check box and enter your password in the generated field.
Tip: If the check box is not available, open the note and ensure the Ready to sign toggle is set to Yes.
-
(Optional) ClickTap the Reuse these credentials for all signatures during this session toggle to set it to Yes.
Notes:
-
If enabled, you can reuse your signature to sign multiple clinical notes.
-
For security purposes, if you are inactive for five minutes or navigate to another page in Ascend Academic, your session expires and you must re-renter your password to continue signing notes.
-
This toggle is not available if signing notes from the Clinical Note window.

Tip: A blue timer bar displays under the password field and indicates how close you are to timing out.
-
-
ClickTap Sign Note.
Note: If you opened the Clinical Note window to edit the note, clicktap Save.
-
(Optional) To sign multiple notes, repeat Steps 2 - 6 as necessary.
Comments
0 comments
Please sign in to leave a comment.