
You can enter a clinical note that has not yet been entered in Ascend Academic. A clinical note is considered not entered if you are set as the provider and it was not added on the day you completed a procedure.
Common reasons why a clinical note is counted as Not Entered:
-
The provider who is assigned to the procedure has not signed the clinical note as the main provider (the first signature).
-
The date of the clinical note does not match the date of the procedure.
-
Procedures are posted after the clinical note is signed. Another clinical note must be created and signed.
To enter clinical notes
How to get there
-
From the Home menu, under Location, select Overview.
The Provider Overview page displays.
Note: If the Overview page displays instead, set the Provider Overview toggle to Yes.
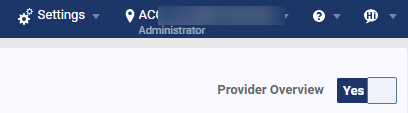
Important: If you are not a provider, the toggle does not display.
-
On the Provider Overview page, clicktap the Unsigned Clinical Notes widget.

Note: The total number of unsigned clinical notes that are set as ready to sign display in the Ready category, and the total number of notes that are set as not ready to sign display in the Draft category.
The Clinical Note Tasks page displays with the All tab selected and the latest unsigned clinical note open.
Tip: If necessary, you can clicktap the patient's name or the Go to Chart link to open and quickly review their Chart page in a new browser tab.

-
ClickTap the Not Entered tab to display a list of unentered clinical notes.

-
(Optional) Set the Date Range to display clinical notes within a certain range.
Note: The field defaults to the last 30 days.
-
ClickTap the Date Range field and select an option.
-
If you selected Specific Date, select a date from the calendar that displays and clicktap Done.
-
If you selected Custom Range, select two dates from the calendar that displays and clicktap Done.
-
-
Select a patient's visit.
On the right, the options for entering a corresponding clinical note displays. Also, the procedure(s) posted for the selected patient on the corresponding date displays for your reference.
-
ClickTap Add Note.
The Add Clinical Note window displays.

-
Set the following fields as necessary.
-
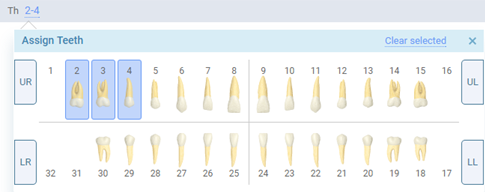
Th - Add tooth numbers to assign teeth to the clinical note:
-
ClickTap the Assign teeth link.

A tooltip displays.
-
Select the teeth.
-
When ready, clicktap X to close the tooltip.
-
-
Provider - Enter a provider to associate with this note.
If you need to add a secondary provider to the note, you can clicktap the
 icon to display the Additional Provider field and enter a secondary provider.
 Tip: To remove the Additional Provider field, clicktap the
 icon.
icon. Note: Only providers who have access to the current location are available.
-
Attending Provider - Enter a faculty provider to associate with the note.
Notes:
-
Only providers who have access to the current location are available.
-
This field is mandatory for students and other users that don't have the Sign clinical notes security right. The Save button will be disabled until an attending provider is set.
-
-
Date and Appointment - You can use these fields to associate the note with a specific date or link it to an existing appointment. By default, the note links to today's earliest appointment.
Note: If you link to an existing appointment, the Attending provider field automatically updates to the linked appointment's attending provider.
Complete any of the following:
-
To associate with a specific date, set the Date field to the date and set the Appointment field to -.
-
To link to an appointment, set the fields to the appointment's date and time.
-
-
Note - Enter the text of the note. You can either type a free-form note or insert a note from a template. To insert a note from a template, select a template listed under the Templates tab. If prompted, respond to enter data and then clicktap Done.
-
Ready to sign - Set the toggle to Yes to set the clinical note as ready to sign. Set the toggle to No to set the clinical note as not ready to sign.
-
Sign as [provider's name] - This check box only displays when the Ready to sign toggle is set to Yes. If necessary, you can sign the new clinical note by selecting the check box and entering your password in the Password field.
-
-
ClickTap Save.
-
Repeat Steps 4-7 as necessary to enter other clinical notes.
Comments
0 comments
Please sign in to leave a comment.