
When you are performing the following tasks, if you discover that a patient and other members of that household do not have patient records, you can add new households:
Looking up a patient's record.
Scheduling an appointment.
To add a new household
How to get there
From the Schedule menu, clicktap Calendar.
The Calendar page opens.
Navigate to a day or week.

Do one of the following:
ClickTap an open time slot.
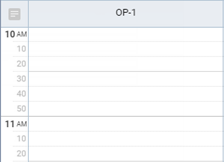
From the Actions menu, clicktap Create Appointment.

The Appointment Information panel opens.

Do one of the following:
When you cannot find a patient's record from the main Patient Search field, clicktap the Create new household option on the results list. This option is available only when what you have typed in the search field narrows the results list enough.

However, if you do not want to re-create a household, you can add patient records individually for the household members that do not have records later (ignore the steps that follow).
When you are attempting to schedule an appointment, from the results list of the Patient Search field on the Appointment Information panel, clicktap Create new household. This option is available only when what you have typed in the search field narrows the results list enough.

Notes:
You can include inactive patients in the search results by setting the Include inactive patients switch to On.
The Create new household dialog box appears.

Enter the first household member's name (first, last, and middle initial), gender, birth date, and preferred name (if applicable).
For each additional household member that you want to add, clicktap Add Patient, and then enter that household member's name (first, last, and middle initial), gender, birth date, and preferred name (if applicable).
The first adult you enter for the household is assigned as the primary contact and primary guarantor by default. However, you can specify a different household member to be the primary contact and primary guarantor or specify one household member to be the primary contact and another to be the primary guarantor. To change the primary contact person, clicktap a Primary Contact icon
 to assign the corresponding patient as the primary contact. To change the primary guarantor, clicktap a Primary Guarantor icon
  to assign the corresponding patient as the primary guarantor. The corresponding icons change from gray scale to color to indicate which patient or patients are selected as the primary contact
  and primary guarantor
  . Minors cannot be primary contacts or guarantors.
Note: If any of the household members listed already have patient records, when you save the household, the primary contact person, primary guarantor, address, and primary phone number in those patients' records will be updated accordingly. If a patient listed should have a different primary contact person, primary guarantor, address, and/or primary phone number than the other household members, remove that person from the list by clickingtapping the corresponding Remove icon
 .
.Under Household Contact, enter the address and a phone number for the specified primary contact person for the household.
ClickTap Save.
Comments
0 comments
Please sign in to leave a comment.