
You can customize the medical alerts that can be attached to patients. Changing a medical alert does not affect patients that already has the medical alert on their records.
To edit a medical alert
How to get there
-
From the Settings menu, under Patient Care, clicktap Medical Alerts Library.
The Medical Alerts Library page displays.
-
On the Medical Alerts Library page, locate and select the desired medical alert:
-
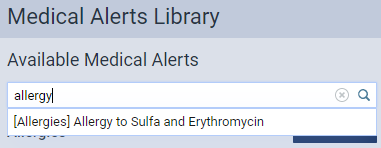
Locate using the search field.
-
Enter the medical alert in the Search for medical alert search field until you see it in the search results, and then select it.
-
-
Locate manually.
-
Expand the medical alert's category and select it from the generated list.

Note: You can locate allergy medical alerts under Allergies and non-allergy medical alerts under Problems.
-
The options for editing it become available.

-
-
Edit as necessary.
Set up the following options:
-
Alert name / Condition - Enter a name or description of the medical alert.
-
Category - This cannot be modified. If the medical alert is in the wrong category, it is recommended you delete the medical alert and recreate it.
-
SNOMED CT code - Enter the SNOMED CT code that you want associated with the medical alert.
-
Show alert - Set the toggle switch to Yes when you want the medical alert to display whenever users access records of patients that have the medical alert. Set to No if you don't want the alert to display when their records are accessed on Ascend Academic.
Note: When set to Yes, it displays with the
 icon on the page.
-
Is permanent - Set the toggle switch to Yes if you want this medical alert to be permanent by default when added to a patient's record. Set the toggle switch to No if you don't want it to be permanent by default.
Note: When set to Yes, the medical alerts displays on the system whenever you access the patient's information.
-
Active - Set the toggle switch to Yes to activate the medical alert or set it to No to inactivate it.
-
-
ClickTap Save.
Comments
0 comments
Please sign in to leave a comment.