
You can edit an existing predetermination claim as necessary.
To change predetermination details
How to get there
-
From the Patient menu, under Clinical, select Treatment Planner.
The patient's clinical record displays with the Tx Planner tab selected.
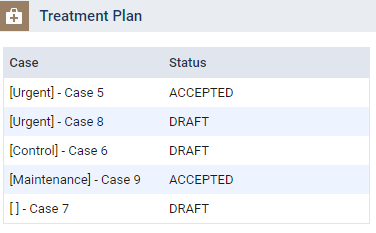
Tip: You can also access the treatment planner from the Patient Information ribbon > Tx Planner link or the patient's Overview page > Treatment Plan widget.
Patient Information ribbon

Treatment Plan widget
Note: If the correct patient is not already selected, use the Patient Search field to access the patient's record.
How to get there
-
From the Patient menu, under Insurance, select Insurance Claims.
The patient's Insurance Claims page displays
Note: If the correct patient is not already selected, use the Patient Search field to access the patient's record.
-
Navigate to a patient's list of predetermination claims from one of the following areas:
-
A patient's treatment planner
-
On a patient's clinical record > Tx Planner tab, clicktap Predetermination.

Note: The Predetermination button displays the total number of the patient's predetermination claims that were created through Ascend Academic.
The Predetermination Requests page displays and lists all predetermination claims that belong to the patient.

-
-
A patient's Insurance Claims page

Predetermination claims display as a PreDet (Primary) claim type, which only displays if the Include predeterminations toggle is set to On.
-
-
Select a predetermination claim to display the Predetermination Detail window.

-
Edit the following tabs as necessary:
-
Procedures
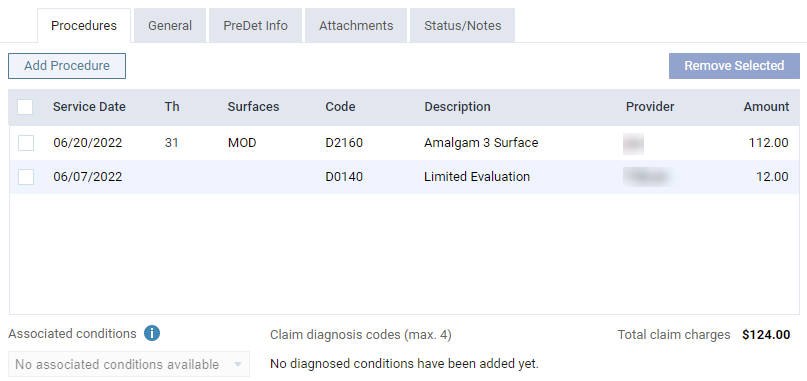
The Procedures tab displays the procedures attached to the claim.
-
To add procedures to the claim:
-
ClickTap Add Procedures to display the Add Procedures window.
On the window, procedures that belong in the same visit as the claim's procedures display.
-
Select the check boxes of the procedures you want to add and clicktap Add Selected.
When added successfully, the Add Procedures window closes and the new procedure(s) display in the list.
-
-
To remove procedures from the claim:
-
Select the check boxes of the procedures you want to remove and clicktap Remove Selected.
Note: The button is only enabled when a procedure is selected.
-
Note: A predetermination claim works like a regular insurance claim, but as predetermination is for incomplete procedures, addition and removal of procedures from the claim does not affect the patient's ledger
-
-
General
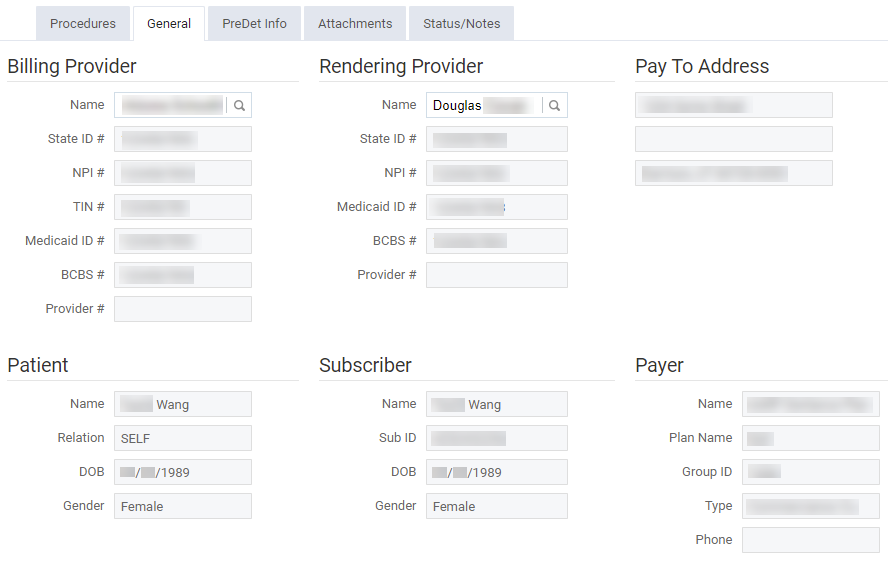
The General tab displays billing provider, rendering provider, pay-to address, patient, subscriber, and payer information.
-
To change the billing and/or rendering provider:
-
Enter the name of the provider in the Name search field under Billing Provider or Rendering Provider and select the provider from the search results. Once selected, the new provider's information displays on the window.
-
-
To update the subscriber and/or payer information:
When the subscriber and/or payer information on the claim is outdated due to changes in the subscriber and/or payer information in the system, a
 icon and a
  icon display beside the outdated section, which is highlighted in orange.
 -
ClickTap the
icon to update to the latest information.
-
-
-
PreDet Info
The PreDet Info tab displays the name of the Referring Provider, the predetermination Reference Number, Orthodontia information (months remaining; and total months, the default value of which is calculated automatically, based on the placement date and remaining months specified, if the predetermination was created for orthodontic treatment), the Place of Service for the associated treatment, Accident Information (type, date, and state), and Remarks For Unusual Services (notes for the insurance carrier for this predetermination only).

-
To enter or modify any of this information, complete/modify the fields as necessary.
Note: Only the first 80 characters of Remarks for Unusual Services are submitted electronically.
-
-
Attachments
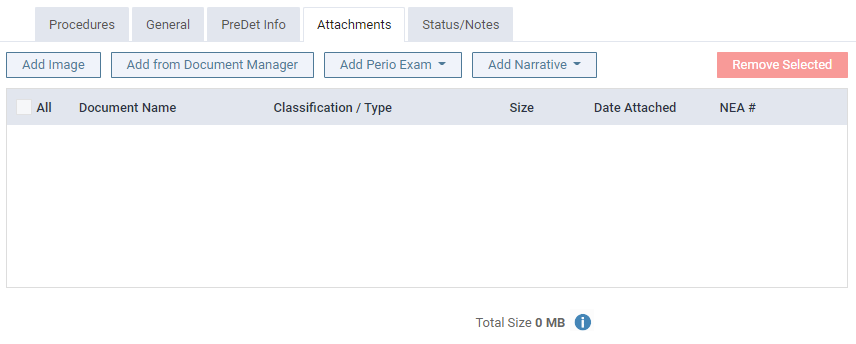
The Attachments tab displays the patient's perio exam and the images from the patient's Document Manager that are attached to the claim. You can add and remove attachments if the predetermination has a status of Unsent, Queued, Sent, Printed, or Attachment Error.
-
To attach an image from Ascend Academic Imaging:
-
clicktap Add Imaging to display the Add from Imaging window with a list of the patient's images.
-
Select the check boxes of images you want to attach to the claim. You can locate the images by the procedures and the service date. You can select the procedure to select all images from that procedure or expand the procedure and select the check boxes of the images to attach them individually.
-
When ready, clicktap Add.

-
-
To add an image attachment from the patient's document manager:
-
ClickTap Add From Document Manager to display the Add From Document Manager window.
-
Select the check box(es) of the image(s) that you want to attach, and select a classification/type for each selected image. If necessary, you can change the classification/type later by selecting a different option from the Classification/Type list on the Attachments tab.
-
ClickTap Save.

-
-
-
ClickTap Add Perio Exam to view a menu that lists the dates of the patient's perio exams, and clicktap the date of the perio exam that you want to attach.
-
-
To attach a narrative:
-
ClickTap Add Narrative to generate a list of the patient's clinical notes.
-
Select a listed clinical note.
-
-
-
Select the All check box to select all the attachments, or select the check boxes of the attachments that you want to remove.
-
ClickTap Remove Selected.
-
When prompted to confirm, clicktap OK.
The attachment(s) are removed from the claim but not from Ascend Academic.
-
Notes:
-
The Add From Document Manager button is not available if the payer is a non-supported carrier (a carrier that was manually added to your practice database, not from the list of supported carriers that Henry Schein maintains; it has payer ID of 06126).
-
The Add Perio Exam button is not available if the payer is a non-supported carrier or if the patient does not have any perio exams entered in their record.
-
You can only attach .jpg/.jpeg image file(s) and one perio exam to a claim.
-
You can attach a maximum of 10 items to a claim.
-
For information about adding attachments to rejected claims, see resubmitting rejected claims.
-
When you add a document from document manager, the action is logged in the Audit Log page as a Patient type with "Document [filename] was viewed" in Details.
-
-
Status/Notes
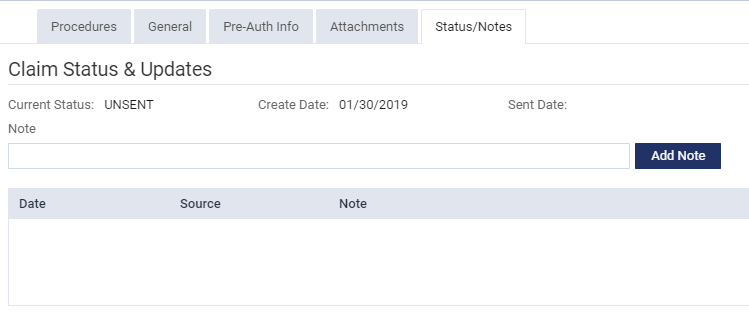
The Status/Notes tab displays the created and sent (if applicable) dates of the predetermination and statuses.
-
To add a custom status update, enter a message in the Note field and clicktap Add Note.
-
-
-
Complete one of the following:
-
ClickTap Save, then close the window.
-
ClickTap Submit to save the changes and submit the predetermination.
-
ClickTap Resubmit to save the changes and resubmit the predetermination.
-
ClickTap Print and when prompted to confirm, clicktap OK to create the predetermination as a printable PDF file.
-
Comments
0 comments
Please sign in to leave a comment.