
You can have an imaging procedure display as a favorite when you acquire images so that you have quick and easy access to that procedure.
To add an imaging procedure to the list of favorites
How to get there
-
If necessary, select the correct location from the Location menu.
-
From the Patient menu, under Clinical, select Imaging.
The patient record displays with the Imaging tab selected.
Tip: You can also access imaging from other clinical areas such as Chart, Progress Notes, Quick Exam, Perio, or Tx Planner.
Note: If the correct patient is not already selected, use the Patient Search field to access the patient's record.
-
On the patient's record > Imaging tab, clicktap the Imaging tab menu and select Acquire Images.


Note: If prompted with a Diagnostic Use Warning window, select the I accept the above-mentioned policy check box and clicktap Accept & Go to Imaging.
-
Under Imaging Procedures, clicktap the Standard or Custom tab and select the imaging procedure that you want to make a favorite.
The options for the selected procedure become available.
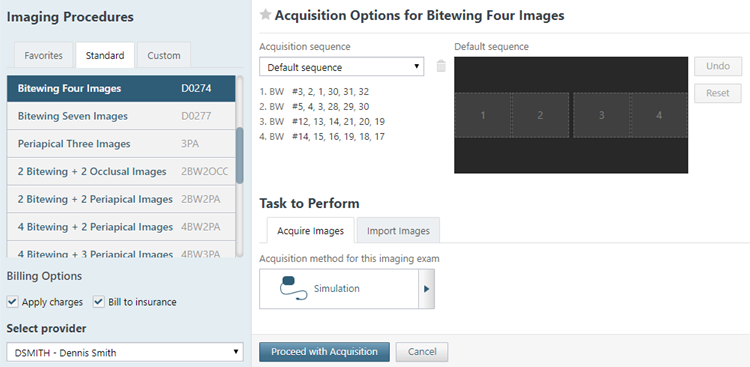
Note: Favorite imaging procedures have a yellow star next to Acquisition Options for [Procedure Name]. Regular imaging procedures have a gray star.
-
Next to Acquisition Options for [Procedure Name], clicktap the gray star.
The star becomes yellow, indicating that the imaging procedure is now a favorite.

Comments
0 comments
Please sign in to leave a comment.