
You can rearrange images within an exam that uses a set of images.
To rearrange images in an exam
How to get there
-
From the Patient menu, under Clinical, select Imaging.
The patient record displays with the Imaging tab selected.
Tip: You can also access imaging from other clinical areas such as Chart, Progress Notes, Quick Exam, Perio, or Tx Planner.
Note: If the correct patient is not already selected, use the Patient Search field to access the patient's record.
-
On the patient's record > Imaging tab, clicktap the Imaging tab menu and select Show Image History.

The patient's imaging page opens to the history view, and the most recent image or series (such as a full mouth series or bitewings) is selected by default on the Images tab.

-
Select a series(such as a full mouth series or bitewings).
-
(Optional) If any of the template slots have multiple images assigned, you can clicktap the Previous or Next button
 above the template slot as needed to view the correct image in the stack.
Notes:
-
The Previous button is not available when viewing the top image or if there is only one image.
-
The Next button is not available when viewing the bottom image or if there is only one image.
-
-
Complete any of the following as necessary:
-
Move one image in a stack to another slot of the template, while in single mode.
-
ClickTap Re-arrange to display the Move Image window.
Tip: You can also select the Re-arrange option on the More menu. The button or menu option is available only if the template slot has multiple images assigned.
-
Complete any of the following:
-
Move an image to another slot in the template - Drag the image to the correct slot. If the destination slot already has an image assigned, the image you have moved will become the top one in the stack for the destination slot and will be selected by default.
-
Change the orientation of an image in the template - Navigate to the correct image in the stack for a template slot (if multiple images are assigned to that template slot), select the image to view the toolbar, and clicktap any of the available buttons as needed: Flip Horizontal, Flip Vertical, Rotate Counterclockwise (90 degrees), and/or Rotate Clockwise (90 degrees).

-
-
When you have finished moving the image, clicktap Confirm.
Note: The button only becomes available once you have moved or changed the orientation of the image.
-
-
Re-arrange multiple images.
-
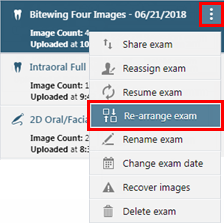
From the selected series' options menu, select Re-arrange exam to display the Re-arrange Exam window.
-
Complete any of the following:
-
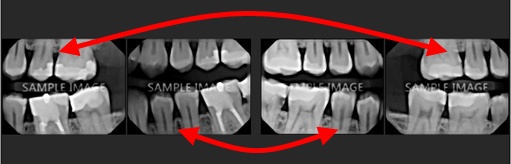
Swap two images in the template - Drag an image to the box with another image.
-
Move an image to an empty box in the template - Drag an image to the correct box.
-
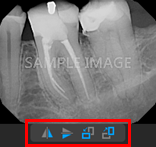
Change the orientation of an image in the template - Navigate to the correct image in the stack for a template slot (if multiple images are assigned to that template slot), select the image to view the toolbar, and clicktap any of the available buttons as needed: Flip Horizontal, Flip Vertical, Rotate Counterclockwise (90 degrees), and/or Rotate Clockwise (90 degrees).

-
-
When you have finished rearranging the images, clicktap Confirm.
Note: The button only becomes available once you have moved or changed the orientation of an image.
-
-
Comments
0 comments
Please sign in to leave a comment.