
You can attach a lab case to a patient's appointment to track readiness.
To attach a lab case to an appointment
-
When you are scheduling or editing an appointment, clicktap the Lab Case tab.

-
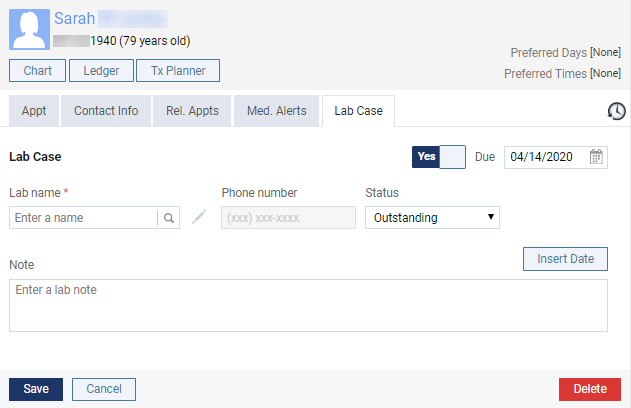
Set the Lab Case toggle to Yes.
The options for adding a lab case become available.
-
Set up the following:
-
Due - By default, the due date is the date of the appointment. If necessary, you can change it to a different date by clickingtapping the field and selecting a date on the calendar.
Note: The due date cannot be after the appointment date.
-
Lab name - Enter the name of the lab and complete one of the following:
-
If the lab is not in the search results, add it to the system:
-
ClickTap Create Lab.

The Create Lab window displays.

-
Enter the lab's name and phone number in the appropriate fields.
-
ClickTap Create.
-
-
If the lab displays in the search results, select it.

Note: To edit the lab's name or phone number, clicktap the
 icon next to the Lab name field.
-
-
Status - By default, the lab case's status is Outstanding, which means the lab work has not been received from the lab. If the lab work has been received from the lab, set the field to Received.
-
Note - Enter any notes regarding the lab case, such as the order number, special handling instructions, contact person, and communications with the lab.
Tip: You can clicktap Insert Date to add today's date where the text cursor is located in the field.
-
-
ClickTap Save.
The appointment now has an icon to indicate that there is a lab case attached to the appointment.

Appointments display the
 icon for outstanding lab cases or the
  icon for received lab cases.
Comments
0 comments
Please sign in to leave a comment.