
You can delete any custom imaging procedure. Deleting a custom imaging procedure does not affect images that have already been taken using that imaging procedure.
To delete a custom imaging procedure
How to get to there
-
If you are not already viewing the correct location, select it from the Location menu.
-
From the Patient menu, under Clinical, select Imaging.
The patient record displays with the Imaging tab selected.
Tip: You can also access imaging from other clinical areas such as Chart, Progress Notes, Quick Exam, Perio, or Tx Planner.
Note: If the correct patient is not already selected, use the Patient Search field to access the patient's record.
-
On the patient's record > Imaging tab, clicktap the Imaging tab menu and select Acquire Images.

The options for acquiring images is available.

-
Under Imaging Procedures, clicktap the Custom tab.
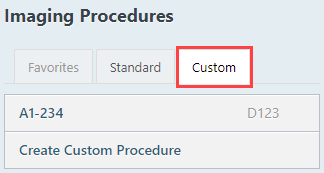
All existing custom imaging procedures display.
Note: Custom and favorite imaging procedures are location specific.
-
Select an imaging procedure.
The options for the selected procedure become available.

-
ClickTap the
 icon next to Acquisition Options for [Procedure Name].
The options to edit the imaging procedure become available.
-
ClickTap Delete.
-
When prompted to confirm, clicktap Yes.
Comments
0 comments
Please sign in to leave a comment.