
You can export an image, a specific image of a series, or an entire series (such as a full mouth series).
To export images
How to get there
-
From the Patient menu, under Clinical, select Imaging.
The patient record displays with the Imaging tab selected.
Tip: You can also access imaging from other clinical areas such as Chart, Progress Notes, Quick Exam, Perio, or Tx Planner.
Note: If the correct patient is not already selected, use the Patient Search field to access the patient's record.
-
On the patient's record > Imaging tab, complete one of the following:
-
View an image or image set from the patient's image history list.
-
From the Imaging tab's menu, select Show Image History.

-
On the Images tab, select an image or series.
Examples: A full mouth series or bitewings.

-
-
View one of the patient's most recent images.
-
From the Imaging tab's menu, select Show Most Recent Images.

-
ClickTap any single image (intraoral X-ray, intraoral photo, extraoral photo, or extraoral X-ray) or an image within a series (such as a full mouth series or bitewings).

-
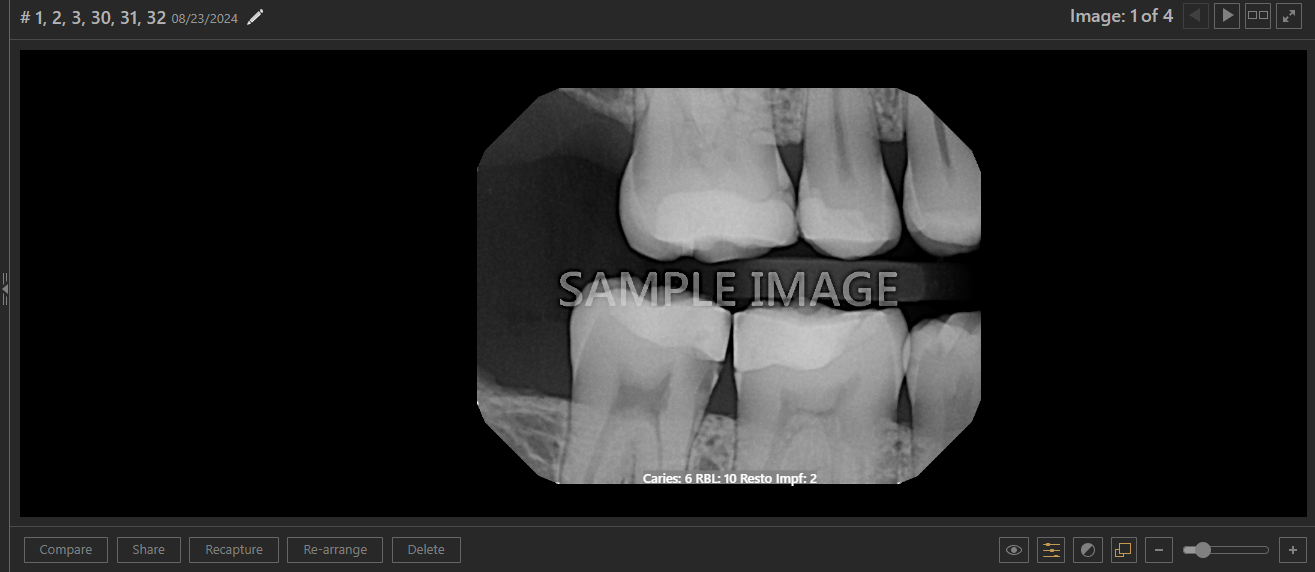
The selected image (or the first of the selected series) displays in the viewing area.
-
-
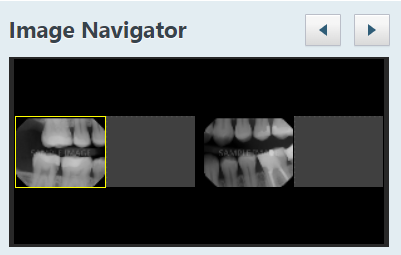
(Optional) If you selected a series and need to view a different image of that series, under Image Navigator, clicktap another image in the series.
-
If you are viewing a series (such as a full mouth series or bitewings) or a set of 2D photos (in a custom template), and if the currently viewed template slot has multiple images assigned, you can clicktap the Previous or Next button
 at the top of the viewing area as needed to view and share another in the stack.
Notes:
-
The Previous button is not available when viewing the top image or if there is only one image.
-
The Next button is not available when viewing the bottom image or if there is only one image.
Tip: If you want to share images that are not top images of their stacks, clicktap the Series Mode
 icon to view all the images in the series at once in the viewing area. For any template slot with multiple images assigned, clicktap the Previous or Next button above the template slot as needed to view the correct image in the stack.
 -
-
Complete one of the following:
-
To export only the image currently being viewed, clicktap Share.
-
To export the selected image or set of images, from the corresponding options menu, select Share exam.

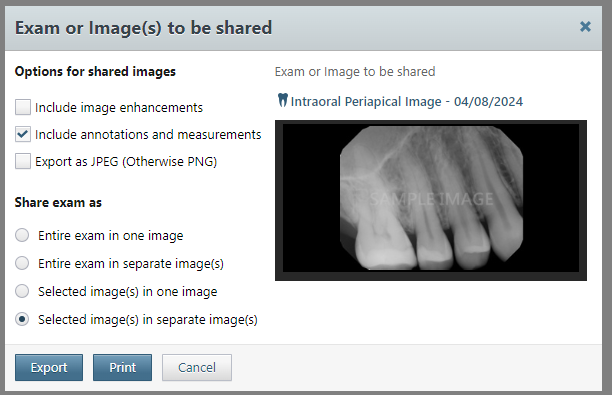
The Exam or Image(s) to be shared window displays.
Note: For a CAD/CAM scan, the image is downloaded as a .ply file. Ignore the remaining steps.
-
-
Set the following options:
-
Include image enhancements - Select this checkbox to apply an enhancement, which adds a balance of sharpening and contrast levels that affects the overall sharpness and contrast, to any of the images being exported that have enhancement applied to their originals. Any images being exported that do not have enhancement applied to their originals will not be exported with enhancement. Deselect this checkbox to not enhance any of the images being exported even if enhancement has been applied to their originals.
-
Include annotations and measurements - Select this checkbox to include any annotations or measurements that were added to the images being exported. Deselect this checkbox to export the images without the annotations and measurements.
-
Export as JPEG (Otherwise PNG) - Select this checkbox to export the images as a .jpeg file. Deselect this checkbox to export the images as .png files.
-
Share exam as - For a series, select one of the following options:
-
Entire exam in one image - To export all the images in the series as one file. A yellow box appears around the entire preview area to indicate that the series is being exported.
Notes:
-
This option is selected by default if you used the Share exam menu option in the previous step for either a series or an individual image (an image that does not belong to a series).
-
If the Entire exam in one image option is selected, and you select an image in the preview area, the Selected image(s) in separate image(s) option is selected automatically.
-
-
Entire exam in separate image(s) - To export the images in the series as separate files. A yellow box displays around the entire preview area to indicate that the series is being exported.
-
Selected image(s) in one image - To export certain images in the series as one file.
With this option selected, the image (which belongs to the series) that was being viewed is selected in the preview area by default. ClickTap the other necessary images in the preview area. Yellow boxes display around the selected images to indicate that those images are being exported. If necessary, you can clicktap a selected image to remove the yellow box so it is not exported, but at least one of the images in the series must be selected.
-
Selected image(s) in separate image(s) - To export certain images in the series as separate files.
Note: This option is selected by default if you used the Share button in the previous step for an image in a series or an individual image that does not belong to a series.
With this option selected, the image (which belongs to the series) that was being viewed is selected in the preview area by default. ClickTap the other necessary images in the preview area. Yellow boxes appear around the selected images to indicate that those images are being exported. If necessary, you can clicktap a selected image to remove the yellow box so it is not exported, but at least one of the images in the series must be selected.
Note: For an individual image (an image that does not belong to a series), that image is exported as an individual file regardless of the Share exam option that is selected.
-
-
-
ClickTap Export.
The images are downloaded.
Comments
0 comments
Please sign in to leave a comment.