
You can view images for selected teeth from a patient's clinical chart and progress notes.
To view images for selected teeth
How to get to there
-
From the Patient menu, under Clinical, select Chart.
The patient record displays with the Chart tab selected.
Note: If the correct patient is not already selected, use the Patient Search field to access the patient's record.
-
On the patient's record > Chart tab, complete one of the following:
-
Select one or multiple teeth with associated images and clicktap Image Peek.
Note: The button is only enabled if a tooth with an image is selected.

-
Select one or multiple teeth with associated images and clicktap the Progress Notes tab. On the Progress Notes tab, clicktap the Imaging icon next to a procedure.
-
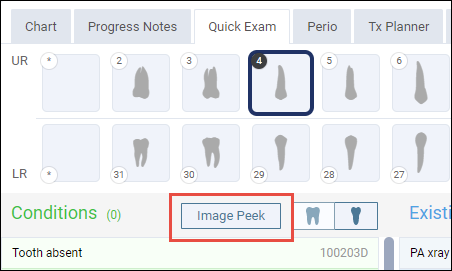
Select one or multiple teeth with associated images and clicktap the Quick Exam tab. On the Quick Exam tab, clicktap Image Peek.
Note: The button is only enabled if a tooth with an image is selected.
Tip: If there is not enough room to display the button with text, it displays as a white tooth on a blue background.

The Image Peek window displays.
Note: Lower resolution images open at their regular size.

-
-
Review as necessary.
Tips:
-
If Ascend Detect AI is activated, radiographic bone loss and caries indicators can display on the image if the X-ray was submitted for analysis previously.
-
If there are multiple images, use the Back and Forward buttons
 to navigate between the images.
 -
To modify an image, clicktap the Open for Editing
 icon.
icon.
-
-
When ready, clicktap Done.
Comments
0 comments
Please sign in to leave a comment.