
You can replace an insurance plan's coverage table with a copy of the coverage table from any other plan. You can use the replacement coverage table as is or make changes as necessary to create a coverage table based on another. Modifying the duplicate coverage table does not change the originating plan's coverage table.
You can also replace a plan's coverage table with a copy of one of the coverage table templates and then modify it as necessary for that plan.
Important: Changing an insurance plan's coverage table affects all patients covered by that insurance plan.
To replace a coverage table
How to get there
-
From the Patient menu, under Insurance, select Insurance Information.
The patient's Insurance Information page displays.
Tip: You can also access the Insurance Information page from the patient's Overview page > Insurance widget.
Note: If the correct patient is not already selected, use the Patient Search field to access the patient's record.
How to get to there
-
From the Home menu, under Insurance, select Carriers.
The Insurance Carriers page displays.
-
Select an insurance carrier.
The options for editing the insurance carrier displays.
-
Under Plans/Employers, select an insurance plan.
The options for editing the insurance plan displays.
-
Complete one of the following:
-
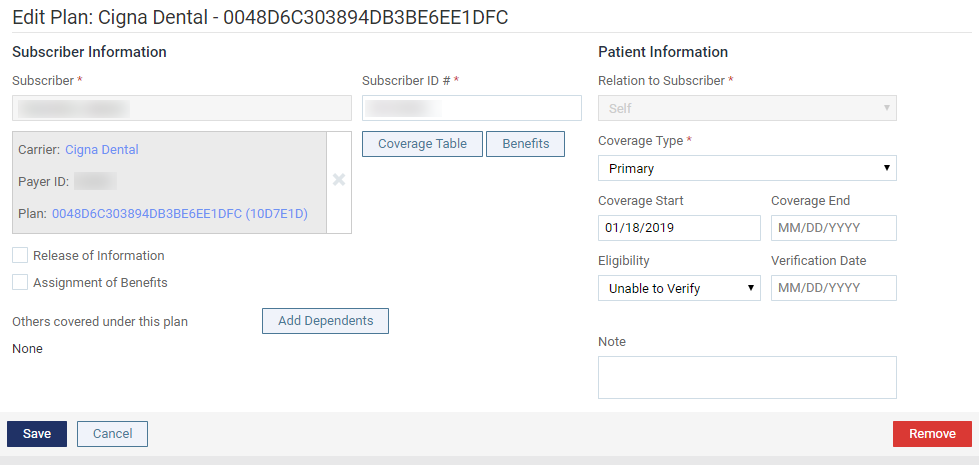
While viewing an insurance plan that is attached to a patient's record, clicktap Coverage Table.
-
While viewing an insurance plan that is associated with a specific insurance carrier, clicktap Coverage Table.
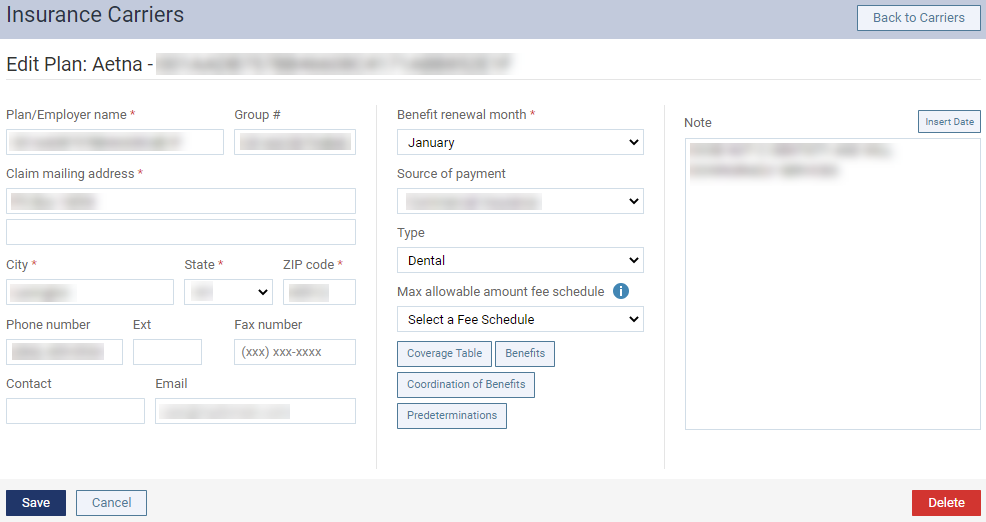
The Coverage Table window displays.

-
-
(Optional) If necessary, select a different option from the Type drop-down list to set to a different coverage table type.

Note: When you change the coverage table type, one of the following occurs:
-
If this is your first time changing this plan's coverage table type, it sets to the new type's default coverage table.
-
If this is not your first time changing this plan's coverage table type, it sets to the previous version of the coverage table for this plan.
-
-
Complete one of the following:
-
From the Select coverage table template drop-down list, select a coverage table template that you want to use as a base or to use as is for the insurance plan's coverage table.

-
Enter the carrier name, group plan, employer ame, or group number of the insurance plan that has the coverage table that you want to copy to the current insurance plan. When it displays on the search results, select it.

The coverage ranges for this insurance plan's coverage table are replaced with a copy of the ranges from the selected coverage table template or from the selected plan's coverage table.
Tip: You can revert to the original coverage table before you save your changes by searching and selecting this insurance plan from the Search for an existing plan search field. Alternatively, you can clicktap Cancel to close the window and not save the change.
-
-
Add, edit, and delete the procedure code ranges as necessary.
-
For an Insurance Coverage, % type table:
-
Complete one of the following:
-
ClickTap Add Range to add a procedure code range.
-
Select an existing procedure code range to edit it.
-
-
Set up the following options for that range as necessary:
-
Code Range - The ADA or custom procedure code range. These fields accept dashes (-), periods (.), numbers, and letters, and they can be up to 10 characters in length. Make sure there are not any overlaps and gaps in the sequence between the starting and ending codes in the range and between other ranges.
You can include an alias procedure codes in a range by entering a period (.) in either text field. The Code Range text fields change to allow for entering suffixes. Enter a suffix in either or both suffix text field. If you need a period in either of the main code boxes (the text fields to the left of the suffix text fields), you must enter the period again in that text field.

Note: When you change a range and then clicktap somewhere else, the text of the range that you modified turns bold. Also, any ranges that overlap or that are invalid become highlighted in red, and you cannot save the changes to the coverage table until those errors are resolved.
-
Category - The procedure category for the procedures in the range.
-
Deductible Type - The type of deductible that the procedures in the range apply to.
-
Coverage % - The percent that the insurance carrier pays on covered charges (after any deductible, up to any allowed amount, and up to any maximum allowed benefit) for procedures in the range.
-
-
Repeat Steps a - b for any other ranges that you want to add or edit.
-
To delete a range, clicktap that range's
 icon, and then clicktap Delete on the generated confirmation message.
Important: If you are deleting the only range in the coverage table, the entire table will be deleted.
-
-
For a Patient Copayment, $ type table:
-
Complete one of the following:
-
ClickTap Add Procedure to add a procedure code(s). From the Add Procedures window, select the check boxes of the procedure code(s) and clicktap Add Checked.
Note: If you are adding procedure codes to a coverage table that already has procedure codes, the procedure codes are added at the top of the table, which might not be the correct order. When you save the template, the procedure codes will be listed in the correct order.
-
Select an existing procedure code range or newly-added procedure code to edit it.

-
-
Set up the following options for that code as necessary:
-
Deductible Type - Select the type of deductible that applies to the procedure.
-
Copayment $ - Enter the specific amount the patients must pay for the procedure.
-
-
Repeat Steps a - c for any other codes that you want to add or edit.
-
To delete a range, clicktap the corresponding Remove
icon, and clicktap Delete, when prompted.Important: If you are deleting the only code in the coverage table, the entire table will be deleted.
-
-
-
To add, edit, or delete exceptions to the coverage for specific procedures, clicktap Manage Exceptions.
-
Complete one of the following:
-
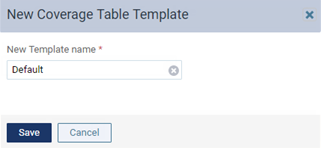
To apply the changes to the coverage table and to create a new coverage table template using the specified coverage options, clicktap Save As New Template. In the generated New Coverage Table Template window, enter a name for the template, and then clicktap Save.
-
To apply the changes to the coverage table, clicktap Save.
-
-
ClickTap Save to save your changes or clicktap Cancel to cancel your changes.
Comments
0 comments
Please sign in to leave a comment.