
You can edit exceptions that have been added previously to a coverage table that is attached to an insurance plan.
Tip: You can edit exceptions in a coverage table when you are editing an insurance plan that is attached to a patient's record, and you can edit exceptions in any of the coverage table templates.
Note: The exceptions in coverage tables are used by Ascend Academic to automatically calculate insurance estimates. If a patient has dual coverage, the exceptions of the primary insurance coverage are used. Also, a posted procedure with an exception will have a warning icon next to it in the following areas of Ascend Academic: the Enter payment window, the Enter credit adjustment window, the Patient Walkout window > Payment tab, and on the treatment plan case preview page. You can click a warning icon to view the details of the exception for the corresponding procedure.

To edit an exception
How to get there
-
From the Patient menu, under Insurance, select Insurance Information.
The patient's Insurance Information page displays.
Tip: You can also access the Insurance Information page from the patient's Overview page > Insurance widget.
Note: If the correct patient is not already selected, use the Patient Search field to access the patient's record.
How to get to there
-
From the Home menu, under Insurance, select Carriers.
The Insurance Carriers page displays.
-
Select an insurance carrier.
The options for editing the insurance carrier become available.
-
Under Plans/Employers, select an insurance plan.
The options for editing the insurance plan become available.
-
Complete one of the following:
-
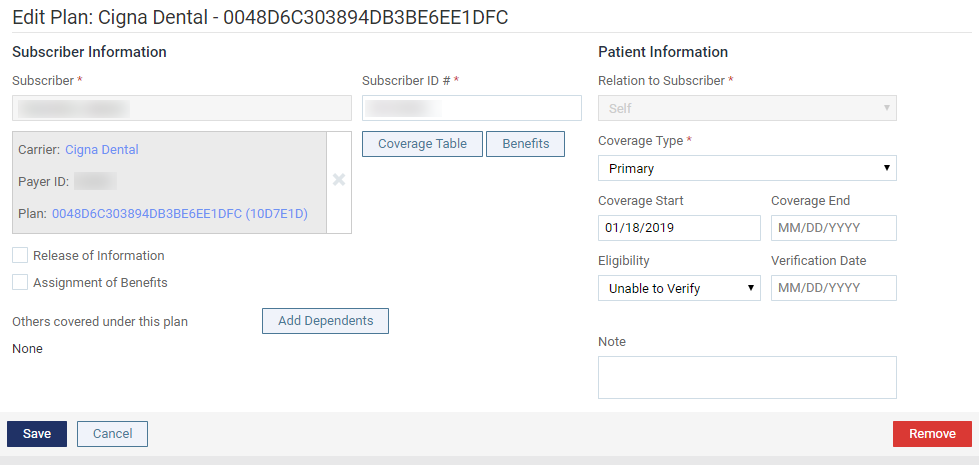
While viewing an insurance plan that is attached to a patient's record, clicktap Coverage Table.
-
While viewing an insurance plan that is associated with a specific insurance carrier, clicktap Coverage Table.
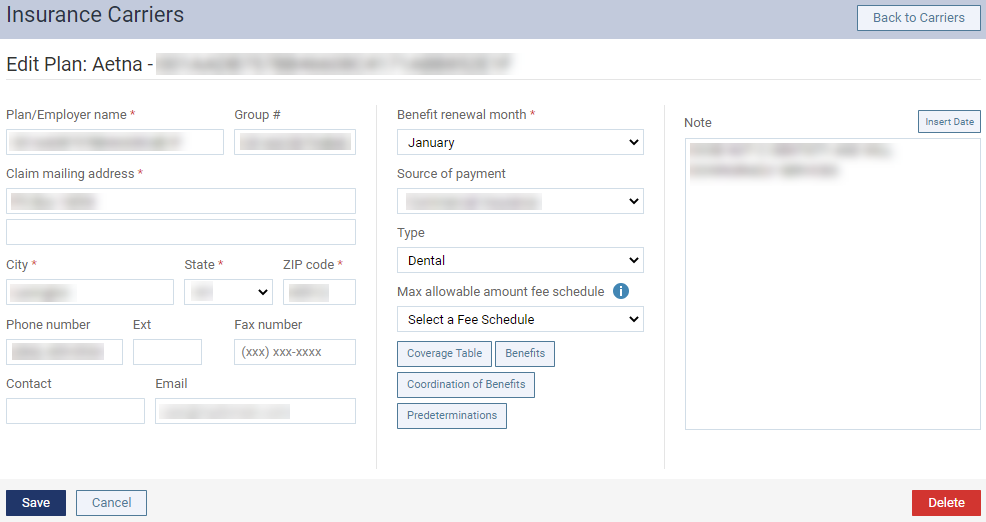
The Coverage Table window displays.

-
-
ClickTap Manage Exceptions to display the Manage Exceptions for [name of insurance plan] window.

-
Expand a procedure code and select an exception.

The options for editing the exception become available.

-
Edit the options on the tabs as necessary:
-
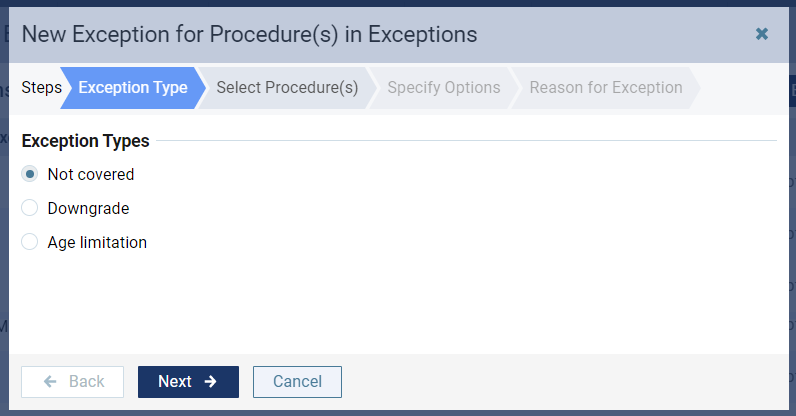
Exception Type
-
Select an option:
-
Not covered - Procedures are not covered.
-
Downgrade - Procedures require a downgrade.
-
Coverage with age limit - Procedures have an age limitation.
-
-
-
Select Procedure(s)
-
Select all procedure(s) that the exception will apply to from the Add Procedure(s) table.

Tip: You can use the search field to enter a specific procedure's code/description and select from the search results.

Notes:
-
For a Not covered exception, you can only select procedures that do not have any exceptions. For a Downgrade exception, you cannot select procedures that have a Not covered or Downgrade exception. For a Age limitation exception, you cannot select procedures that have a Not covered or Age limitation exception. Incompatible procedures will display with an
 icon to prevent you from accidentally selecting them.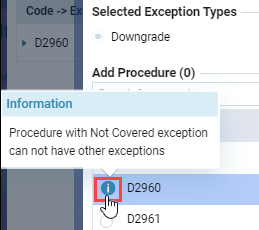
-
You can select multiple procedures for Not covered and Age limitation exception types, but you can only select one procedure code for Downgrade.
-
-
-
Specific Options
-
Complete one of the following:
-
For a Not covered exception, there are no options on this tab.
-
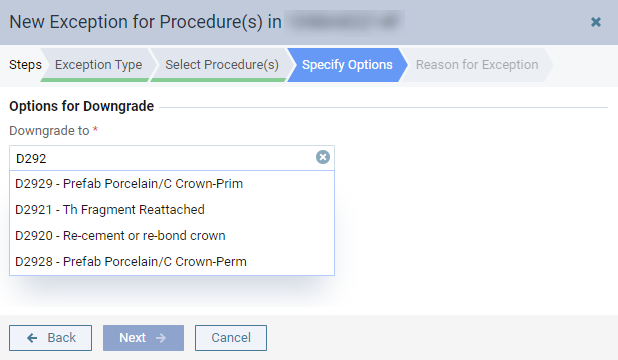
For a Downgrade exception, enter the code/ description of the substitute procedure in the Downgrade to search field, and select the codes.
-
For an Age limitation exception, configure the following options:

-
Age limitation - Enter a minimum and maximum age limit to specify that the insurance carrier covers this procedure only for patients whose age is within the specified limit. You can also adjust the range by moving the sliders as necessary.
Note: If a patient's age is not within the age limit, the percentage or copayment in the coverage table is used.
-
Coverage, %, Copayment, $ , or Downgrade to - Specify a coverage percentage, copayment, or a downgrade.
-
For a coverage percentage, select the Coverage, % radio button and enter the percentage of the charged fee that the insurance carrier covers for this procedure.
-
For a copayment, select the Copayment, $ radio button and enter the co-pay that the patient pays for this procedure.
-
For a downgrade, select the Downgrade to radio button. In the Search for procedure field, enter and select the substitute procedure's code/description.
Note: The Coverage, % radio button displays for coverage tables that are based on insurance coverage percentages while and the Copayment, $ radio button displays for coverage tables that are cased on fixed patient copayments.
-
-
Deductible Type - If a patient must pay a deductible for this procedure, select the check box and select the deductible type the patient must pay for this procedure from the drop-down list.
Note: The check box is only enabled if the Coverage, % or the Copayment, $ radio button is selected.
-
-
-
ClickTap Next.
-
-
Reason for Exception
-
Enter a new reason for the coverage exception in the Reason for exception field.

-
-
-
ClickTap Done.
Note: This button is available only if the Reason for Exception tab is selected.
Comments
0 comments
Please sign in to leave a comment.