
If you acquired images using an imaging procedure for a series of intraoral X-rays, but skipped the acquisition of any of the images in the series or canceled the acquisition of the series before acquiring all the images, you can return to that set and complete the image acquisitions as needed.
To resume an incomplete exam or retake images
How to get to there
-
From the Patient menu, under Clinical, select Imaging.
The patient record displays with the Imaging tab selected.
Tip: You can also access imaging from other clinical areas such as Chart, Progress Notes, Quick Exam, Perio, or Tx Planner.
Note: If the correct patient is not already selected, use the Patient Search field to access the patient's record.
-
On the patient's record > Imaging tab, clicktap the Imaging tab menu and select Show Image History.

The patient's imaging page opens to the history view, and the most recent image or series (such as a full mouth series or bitewings) is selected by default on the Images tab.

-
Select a series (such as a full mouth series or bitewings).
-
On the corresponding options menu, clicktap Resume exam.
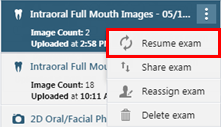
The Acquisition Options window displays.

-
Under Acquisition sequence, select Default sequence or a custom order (if any).
-
If you are using phosphor plates to acquire one or more images, before continuing, acquire the radiographs as needed.
-
Position a phosphor plate in the patient's mouth, and align your X-ray source cone to point at the phosphor plate, utilizing the paralleling or bisecting angle techniques. Make sure that the edge of the phosphor plate with the dot or letter is pointing upward for all vertical placements or pointing toward the back of the mouth for all horizontal placements.
Important: A phantom, test target, and/or another non-human object should be X-rayed when installing or using any image acquisition device for the first time in Ascend Academic Imaging to verify proper operation prior to use on live patients.
-
Set the appropriate exposure time on your X-ray source's control panel for the specific imaging device in use and trigger the radiation emission. (Refer to the documentation provided by the manufacturer of your X-ray source for details about changing settings and usage.)
Note: Radiation from an X-ray source causes the phosphor plate to capture the image, and this is controlled by someone triggering the X-ray source. The Ascend Academic Imaging program does not directly control the X-ray source or exposure settings.
-
Repeat Steps a-b as needed to acquire additional radiographs.
-
-
ClickTap Proceed with Acquisition.
The options for acquiring images in the series display.

-
Acquire one or more intraoral X-rays according to the type of device that was used to acquire the images in the series originally.
Series of images with a sensor
The first step with a missing image in the acquisition sequence for the template is selected automatically (as indicated by the green, numbered box) on the sequence diagram, and the applicable teeth are selected on the Tooth status chart for your reference.
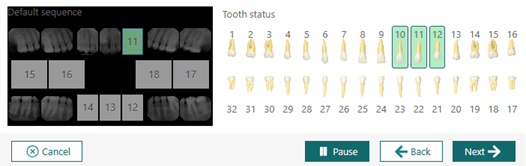
The X-ray sensor becomes ready for exposure.
Notes:
-
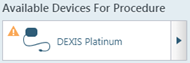
If you need to change the acquisition device, clicktap Pause, select a different device on the Available Devices for Procedure menu, and clicktap Capture [teeth].
-
To skip ahead in the acquisition sequence by one step, clicktap Skip Forward and clicktap Capture [teeth] or Recapture [teeth].
-
To go backward in the acquisition sequence by one step, clicktap Skip Backward and clicktap Capture [teeth] or Recapture [teeth].
-
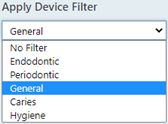
If applicable for the selected acquisition device, the Apply Device Filter list is available. From the list, select the filter that you want to have applied automatically to the image that will be acquired (Endodontic, Periodontic, General, Caries, or Hygiene), or select No Filter.
-
From the Automatically Apply Enhancement list, select a type of enhancement that you want to have applied automatically to the image that will be acquired (Entire Image, For Perio, For Endo), or select Not Enhanced.
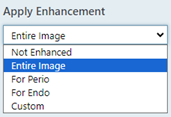
Tip: While viewing an image after it has been acquired, you can turn the enhancement off and on as the original, raw image is preserved.
-
Position the sensor in the patient's mouth, and align your X-ray source cone to point at the sensor, utilizing the paralleling or bisecting angle techniques.
Important: A phantom, test target, and/or another non-human object should be X-rayed when installing or using any image acquisition device for the first time in Ascend Academic Imaging to verify proper operation prior to use on live patients.
-
Set the appropriate exposure time on your X-ray source's control panel for the specific imaging device in use and trigger the radiation emission, which initiates the capture of the X-ray image. (Refer to the documentation provided by the manufacturer of your X-ray source for details about changing settings and usage.)
Note: Radiation from an X-ray source initiates the imaging device (sensor) to capture an image, and this is controlled by someone triggering the X-ray source. The Ascend Academic Imaging program does not directly control the X-ray source or exposure settings.
-
If you acquired an image for a step in the acquisition sequence that already has an image, the Select Image window displays. Keep the Delete rejected image checkbox deselected to have the rejected image hidden or select the checkbox to have the rejected image be deleted, and clicktap Keep New to keep the recaptured image and put it on the top of the image stack for the template slot or Keep Old to keep the existing images and leave it on the top of the image stack for the template slot.

A preview of the resulting image displays. Also, if the image that you just acquired was not for the last step in the acquisition sequence, the next step with a missing image in the acquisition sequence is selected automatically (as indicated by the green, numbered box) on the sequence diagram, and the applicable teeth are selected on the Tooth status chart for your reference.
Notes:
-
To replace the image that you acquired in the previous step of the acquisition sequence, clicktap Recapture [teeth]. When the X-ray sensor becomes ready for exposure, acquire the new image. The Select Image window displays. Keep the Delete rejected image checkbox deselected to have the rejected image hidden or select the checkbox to have the rejected image be deleted, and clicktap Keep New to keep the recaptured image and put it on the top of the image stack for the template slot or Keep Old to keep the existing images and leave it on the top of the image stack for the template slot..
-
To skip ahead in the acquisition sequence by one step, clicktap Cancel, clicktap Skip Forward, and clicktap Capture [teeth] or Recapture [teeth].
-
To go backward in the acquisition sequence by one step, clicktap Cancel, clicktap Skip Backward, and clicktap Capture [teeth] or Recapture [teeth].
-
-
Repeat Steps a-e as needed to acquire other images in the series.
-
ClickTap Finish Acquisition.
-
If any images fail to upload, a message displays and provides the option for you to recover the images. ClickTap Recover Images to begin the recovery process.
Series of imported images
The first step with a missing image in the acquisition sequence for the template is selected automatically (as indicated by the green, numbered box) on the sequence diagram, and the applicable teeth are selected on the Tooth status chart for your reference.
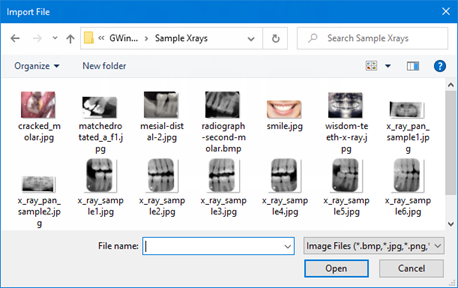
The Import File window displays.
Notes:
-
If you need to change the acquisition device, clicktap Cancel, select a different device on the Available Devices for Procedure menu, and clicktap Capture [teeth] or Recapture [teeth].
-
To skip ahead in the acquisition sequence by one step, clicktap Cancel, clicktap Skip Forward, and clicktap Capture [teeth] or Recapture [teeth].
-
To go backward in the acquisition sequence by one step, clicktap Cancel, clicktap Skip Backward, and clicktap Capture [teeth] or Recapture [teeth].
-
To apply an enhancement to the images that will be acquired, clicktap Cancel. From the Automatically Apply Enhancement list, select the type of enhancement that you want to have applied automatically (Entire Image, For Perio, or For Endo) and clicktap Capture [teeth] or Recapture [teeth].
Tip: While viewing an image after it has been acquired, you can turn the enhancement off and on as the original, raw image is preserved.
-
In the Import File window, select the correct image file.
-
ClickTap Open.
-
If you imported an image for a step in the acquisition sequence that already has an image, the Select Image window displays. Keep the Delete rejected image checkbox deselected to have the rejected image hidden or select the checkbox to have the rejected image be deleted, and clicktap Keep New to keep the recaptured image and put it on the top of the image stack for the template slot or Keep Old to keep the existing images and leave it on the top of the image stack for the template slot.
A preview of the resulting image displays. Also, if the image that you just acquired was not for the last step in the acquisition sequence, the next step with a missing image in the acquisition sequence is selected automatically (as indicated by the green, numbered box) on the sequence diagram, and the applicable teeth are selected on the Tooth status chart for your reference.
Notes:
-
To replace the image that you acquired in the previous step of the acquisition sequence, clicktap Recapture [teeth]. When the X-ray sensor becomes ready for exposure, acquire the new image. The Select Image window displays. Keep the Delete rejected image checkbox deselected to have the rejected image hidden or select the checkbox to have the rejected image be deleted, and clicktap Keep New to keep the recaptured image and put it on the top of the image stack for the template slot or Keep Old to keep the existing images and leave it on the top of the image stack for the template slot..
-
To skip ahead in the acquisition sequence by one step, clicktap Cancel, clicktap Skip Forward, and clicktap Capture [teeth] or Recapture [teeth].
-
To go backward in the acquisition sequence by one step, clicktap Cancel, clicktap Skip Backward, and clicktap Capture [teeth] or Recapture [teeth].
-
-
Repeat Steps a-c as needed to import other images in the series.
-
ClickTap Finish Acquisition.
-
If any images fail to upload, a message displays and provides the option for you to recover the images. ClickTap Recover Images to begin the recovery process.
Series of images with a phosphor plate scanner
-
From the Automatically Apply Enhancement list, select a type of enhancement that you want to have applied automatically to the acquired images (Entire Image, For Perio, For Endo), or select Not Enhanced.
Tip: While viewing an image after it has been acquired, you can turn the enhancement off and on as the original, raw image is preserved.
-
Put the phosphor plates, with the edges with the dot or letter pointing up, in the scanner according to the manufacturer's instructions.
-
ClickTap Start Scanning.
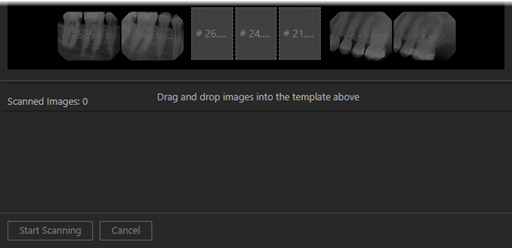
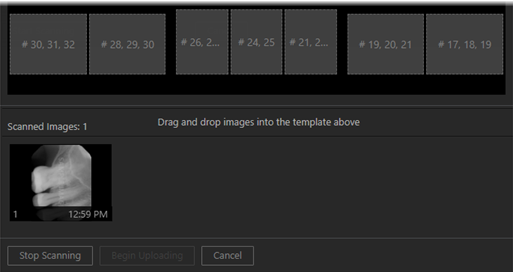
As the scanner finishes scanning a plate, the resulting image displays as a thumbnail image on the panel at the bottom of the Ascend Academic Imaging program.
-
After all the plates have been scanned, one at a time, drag the thumbnail images from the panel to the correct boxes of the template.
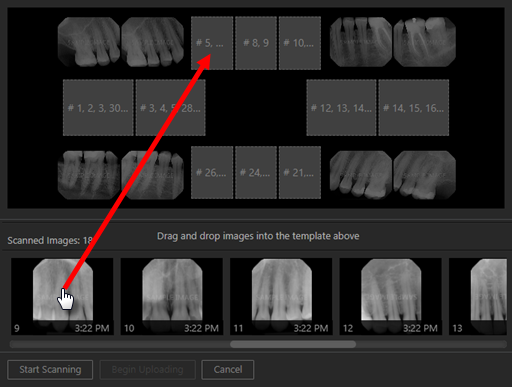
Note: If the orientations the phosphor plates were correct when the radiographs were taken and when inserted into the scanner, the images will have the correct orientation in the series. When you drop a thumbnail image into a box of the template, the image is rotated automatically as needed for that position in the series.
-
As needed, complete any of the following:
-
To stack multiple images in one template slot, drag a thumbnail image from the panel at the bottom or an image from a template slot to a template slot that already has an image assigned. That image is put on the top of the image stack for that template slot, but you can choose a different image to be on top.
-
To choose the top image for a template slot with multiple images, clicktap the Previous or Next button
 above the template slot as needed to view the correct image in the stack. The image that is visible in the stack when you clicktap Begin Uploading will be set as the top image of the stack, but you can choose a different image to be on top later.
 -
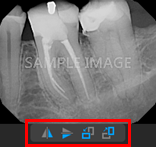
To change the orientation of an image in the template, navigate to the correct image in the stack for a template slot (if multiple images are assigned to that template slot), select the image to view the toolbar and clicktap any of the available buttons as needed: Flip Horizontal, Flip Vertical, Rotate Counterclockwise (90 degrees), and/or Rotate Clockwise (90 degrees).
-
To remove a new image from the template, navigate to the correct image in the stack for a template slot (if multiple images are assigned to that template slot) and drag the image back to the panel at the bottom.
-
-
ClickTap Begin Uploading to save the mounted images to the patient's record.
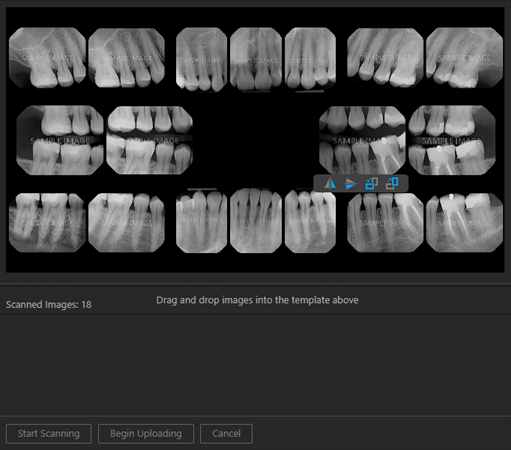
If not all thumbnail images have been mounted to the template when you clicktap Begin Uploading, a message displays, stating that unassigned images will not be saved to the patient's record.

-
If prompted, clicktap one of the following buttons:
-
Send to Recovery - This saves the unassigned images. You can assign them to the patient later using the existing functionality for recovering images.
-
Discard Images - This deletes the unassigned images permanently.
-
Stay on Page - This allows the user to continue to assign unassigned images or make other changes without leaving the page.
-
If any images fail to upload, a message displays and provides the option for you to recover the images. ClickTap Recover Images to begin the recovery process.
Series of images with a third-party program (TWAIN or bridge)
-
Use the options in the third-party TWAIN interface or imaging program that opens to get ready to acquire images.
-
Position the sensor in the patient's mouth, and align your X-ray source cone to point at the sensor, utilizing the paralleling or bisecting angle techniques.
Important: A phantom, test target, and/or another non-human object should be X-rayed when installing or using any image acquisition device for the first time in Ascend Academic Imaging to verify proper operation prior to use on live patients.
-
Set the appropriate exposure time on your X-ray source's control panel for the specific imaging device in use and trigger the radiation emission. (Refer to the documentation provided by the manufacturer of your X-ray source for details about changing settings and usage.)
Note: Radiation from an X-ray source initiates the imaging device (sensor) to capture an image, and this is controlled by someone triggering the X-ray source. The Ascend Academic Imaging program does not directly control the X-ray source or exposure settings.
-
Repeat Steps b-c as needed to acquire other images for the series.
-
Close the third-party TWAIN interface or imaging program.
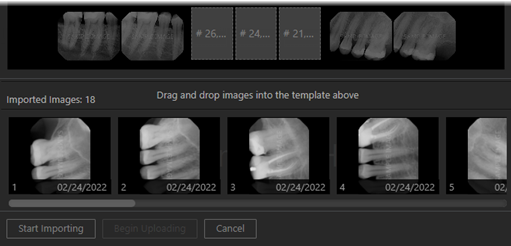
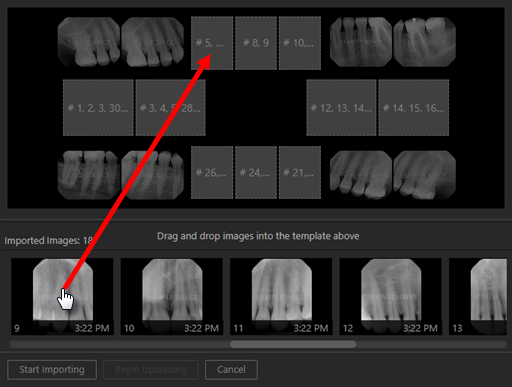
The images that you acquired in the third-party imaging program display as thumbnail images on the panel at the bottom of the Ascend Academic Imaging program.
-
From the Automatically Apply Enhancement list, select a type of enhancement that you want to have applied automatically to the acquired images (Entire Image, For Perio, For Endo), or select Not Enhanced.
Tip: While viewing an image after it has been acquired, you can turn the enhancement off and on as the original, raw image is preserved.
-
One at a time, drag the thumbnail images from the panel to the correct boxes of the template.
-
As needed, complete any of the following:
-
To stack multiple images in one template slot, drag a thumbnail image from the panel at the bottom or an image from a template slot to a template slot that already has an image assigned. That image is put on the top of the image stack for that template slot, but you can choose a different image to be on top.
-
To choose the top image for a template slot with multiple images, clicktap the Previous or Next button
above the template slot as needed to view the correct image in the stack. The image that is visible in the stack when you clicktap Begin Uploading will be set as the top image of the stack, but you can choose a different image to be on top later. -
To change the orientation of a new image in the template, select it to view the toolbar and clicktap any of the available buttons as needed: Flip Horizontal, Flip Vertical, Rotate Counterclockwise (90 degrees), and/or Rotate Clockwise (90 degrees).
-
To remove a new image from the template, navigate to the correct image in the stack for a template slot (if multiple images are assigned to that template slot), drag the image back to the panel at the bottom.
-
-
ClickTap Begin Uploading to save the mounted images to the patient's record.
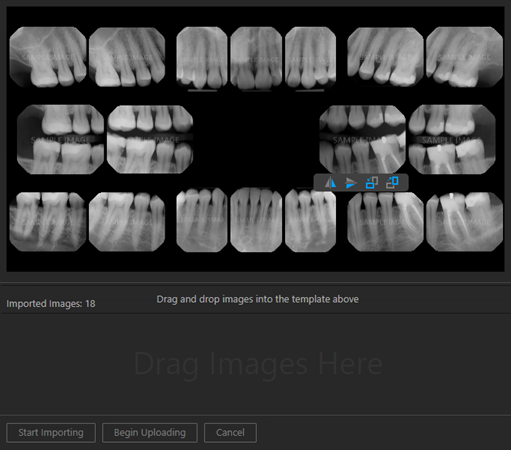
If not all thumbnail images have been mounted to the template when you clicktap Begin Uploading, a message displays, stating that unassigned images will not be saved to the patient's record.
-
If prompted, clicktap one of the following buttons:
-
Send to Recovery - This saves the unassigned images. You can assign them to the patient later using the existing functionality for recovering images.
-
Discard Images - This deletes the unassigned images permanently.
-
Stay on Page - This allows the user to continue to assign unassigned images or make other changes without leaving the page.
If any images fail to upload, a message displays and provides the option for you to recover the images. ClickTap Recover Images to begin the recovery process.
-
-
Comments
0 comments
Please sign in to leave a comment.