
You can set up the Student Checklist for your organization to help ensure that student providers perform all critical stages of patient care according to standard protocol.
Student providers can use the checklist to ensure they have completed all steps in their patient management. Faculty members can view pending and completed checklists to ensure students are following standard protocol for patient care.
Once configured, all appointments that are created will display with a  button.
Important: You must have the Manage Checklist security right to configure the Student Checklist.
To set up the Student Checklist
How to get there
-
From the Settings menu, under Academic, clicktap Student Checklist.
The Student Checklist Setup page displays.
-
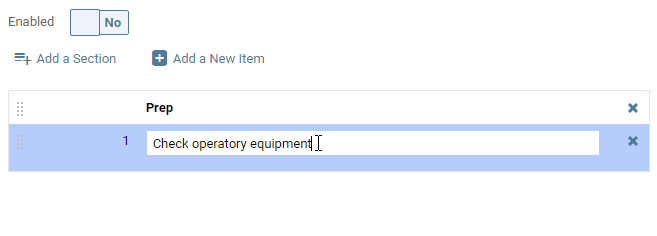
On the Student Checklist Setup page, set the Enabled toggle to Yes.

-
Complete any of the following:
-
Add sections.
-
ClickTap Add a Section.

-
ClickTap in the section, enter a name, and clicktap away.

-
-
Add checklist items.
-
ClickTap Add a New Item.

-
ClickTap in the checklist item, enter a name, and clicktap away.
-
-
Delete items.
-
Next to a listed entry, clicktap the corresponding X icon.
-
-
Reorder items.
-
Next to a listed entry, clicktap and drag the
 icon as necessary.
-
-
-
(Optional) ClickTap Preview to display the Student Checklist Preview window and review how the checklist will display to student providers. When ready, clicktap Cancel to close.

-
ClickTap Save.
Comments
0 comments
Please sign in to leave a comment.