
By default, Ascend Academic displays your location's general consent message in the following areas:
-
When a patient's consent is required for their procedure(s)
-
On a consented Patient Consent Form
-
On the print view of an accepted treatment plan
If your location's general consent message doesn't apply to a specific procedure, you can customize a consent message for that procedure. Once customized, it will display instead of the general consent message when the associated procedure is involved.
You can create a procedure-specific consent message for one procedure or for a group of procedures.
Important: You need the Manage Consent Messages user role permission set to add a procedure-specific consent message.
Note: You can only add a procedure-specific consent message for your location. You cannot add for your organization or for multiple locations at once.
To add procedure consent messages
How to get there
-
From the Settings menu, under Production, clicktap Consent Messages.
The Consent Messages page displays.
-
On the Consent Messages page, review the list of existing procedure-specific consent messages to confirm a customized consent message doesn't exist for the desired procedure code(s).

-
ClickTap Add Consent Messages.
The Create Procedure Consent Message window displays.

-
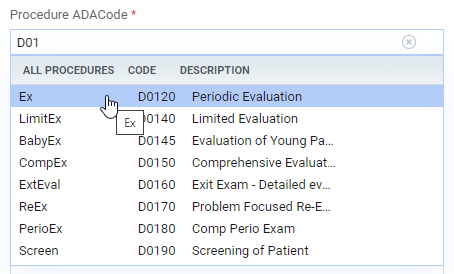
Enter the desired procedure's code or description in the Procedure ADACode field and select it from the generated search results.
-
(Optional) To apply the consent message to multiple procedures, repeat Step 3 as necessary.
-
Enter the desired custom message in the Consent Message field.
-
ClickTap Save.
Comments
0 comments
Please sign in to leave a comment.